

Step 1
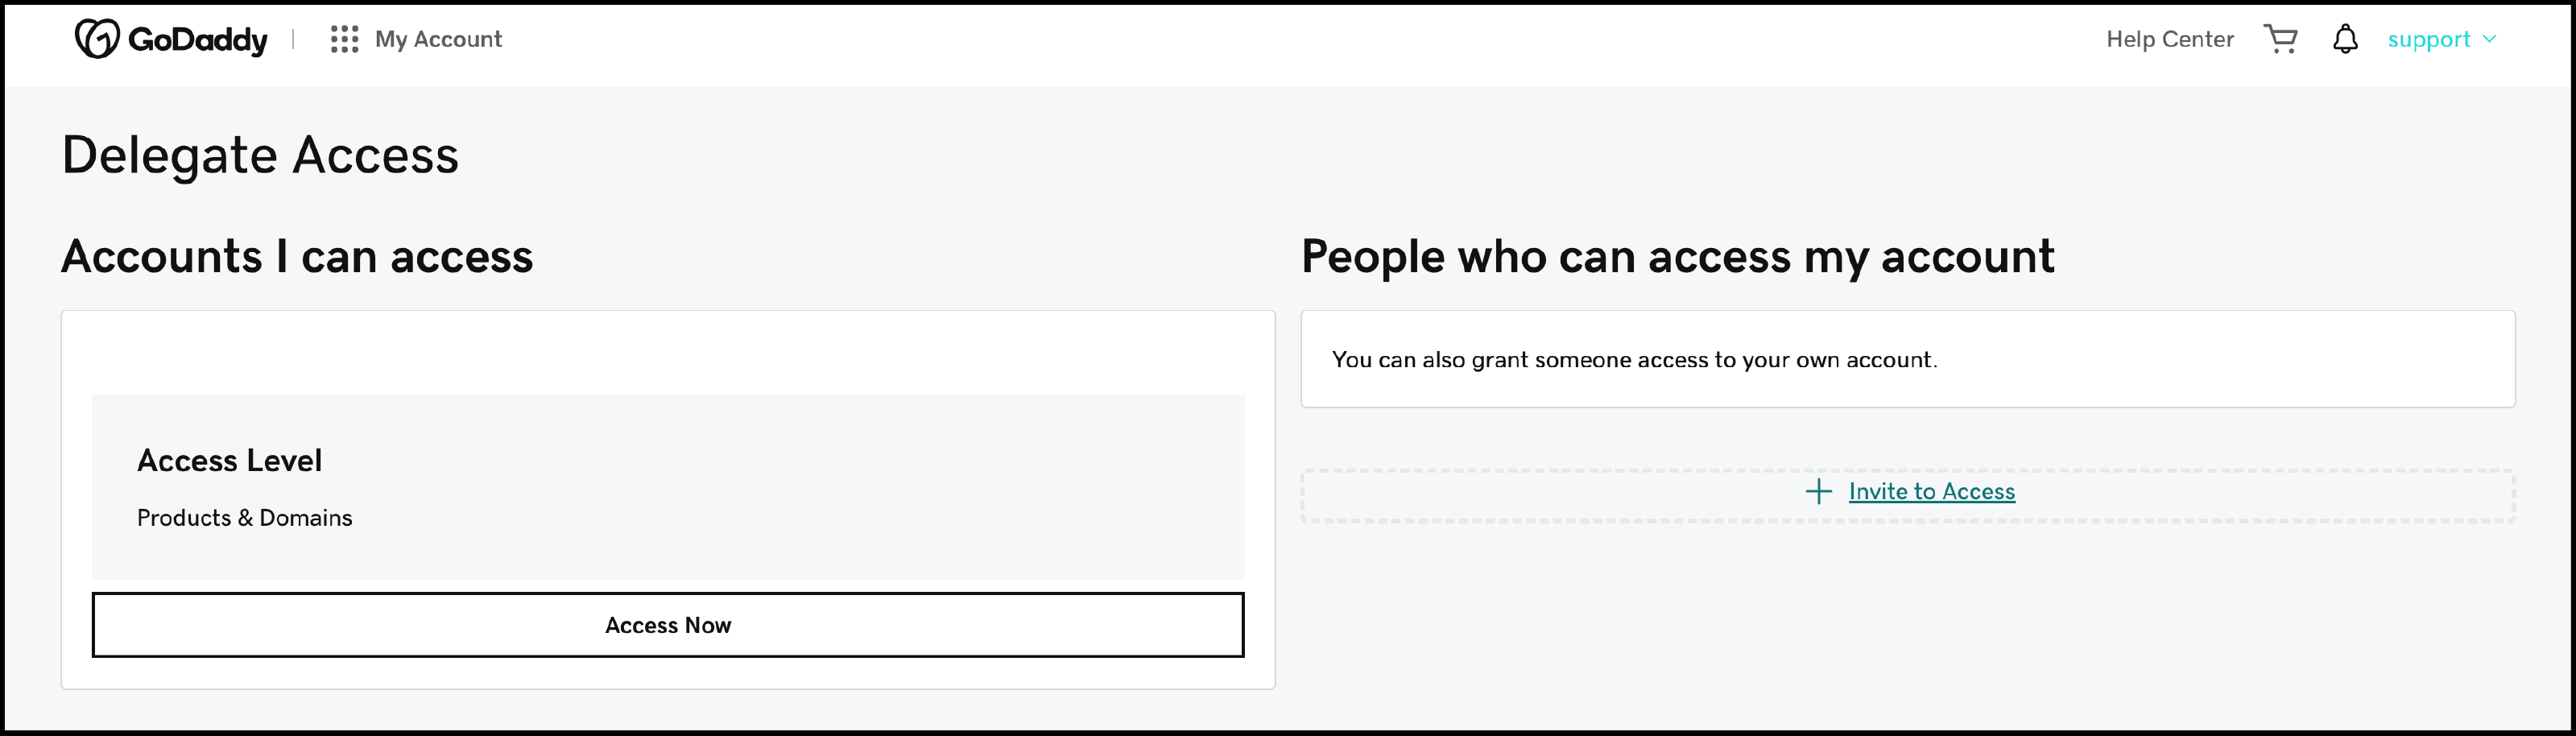
Go to your GoDaddy Delegate Access page. You might be prompted to sign in. It should look like the image below.
Step 2
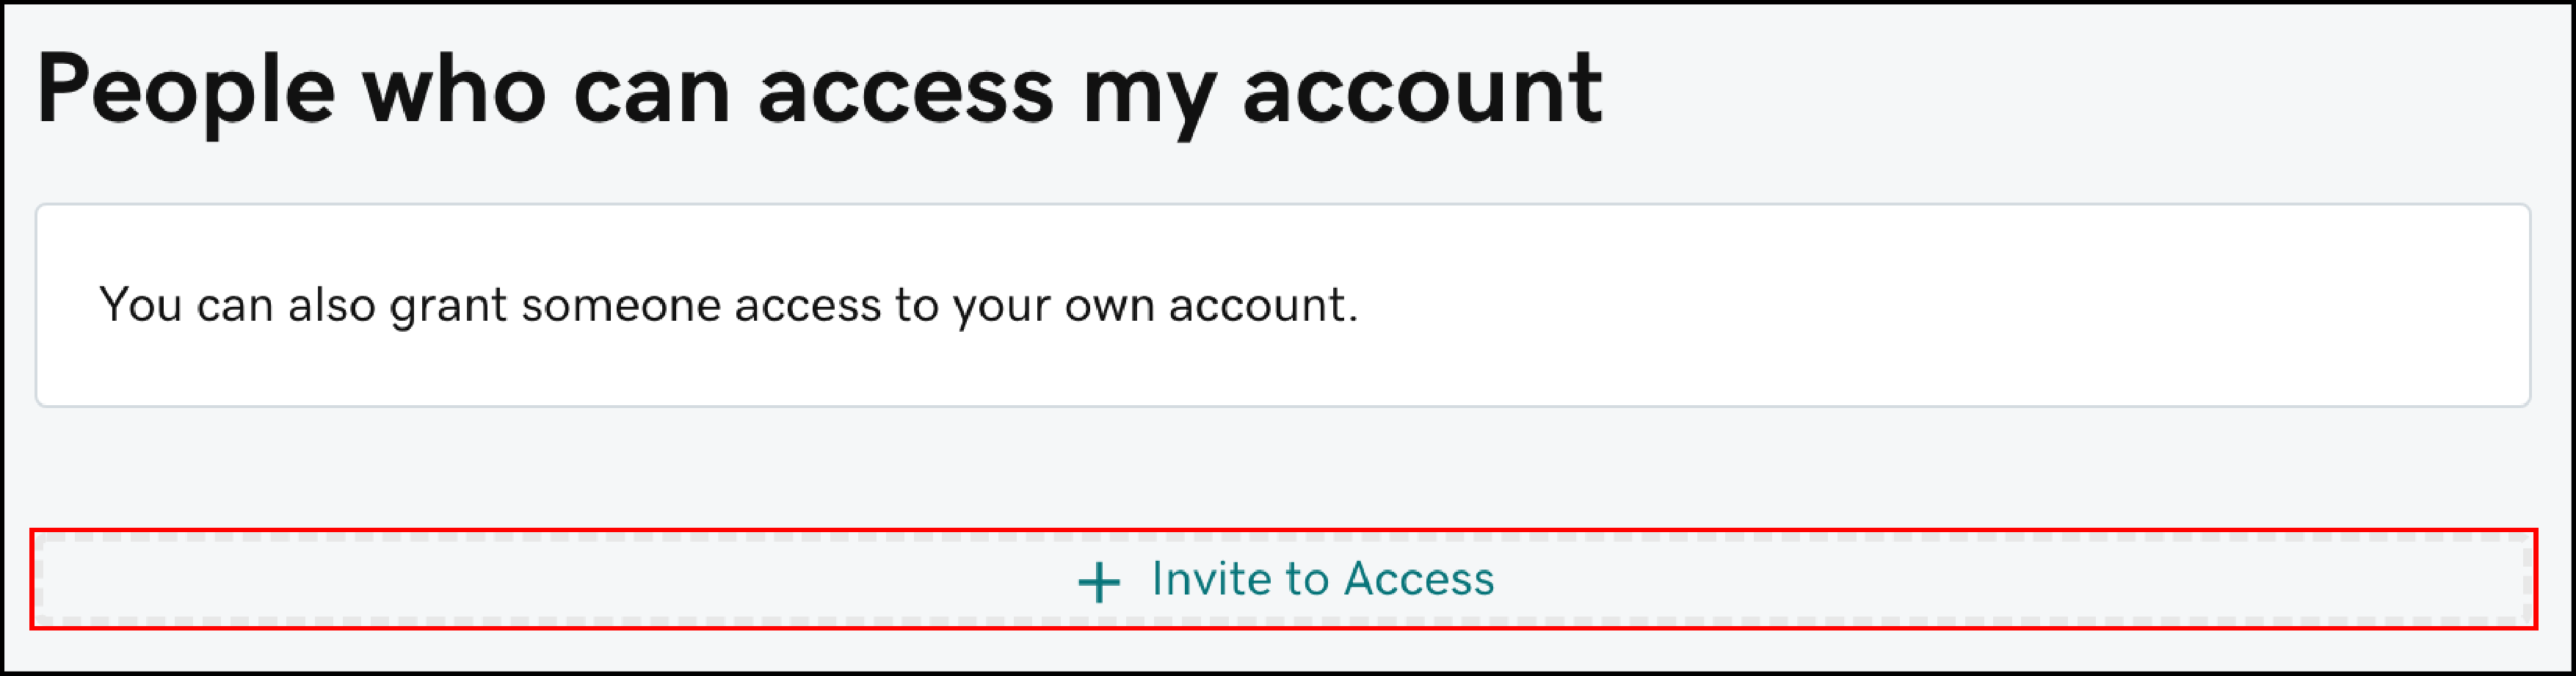
In the People who can access my account section, select Invite to Access. See image below.
Step 3
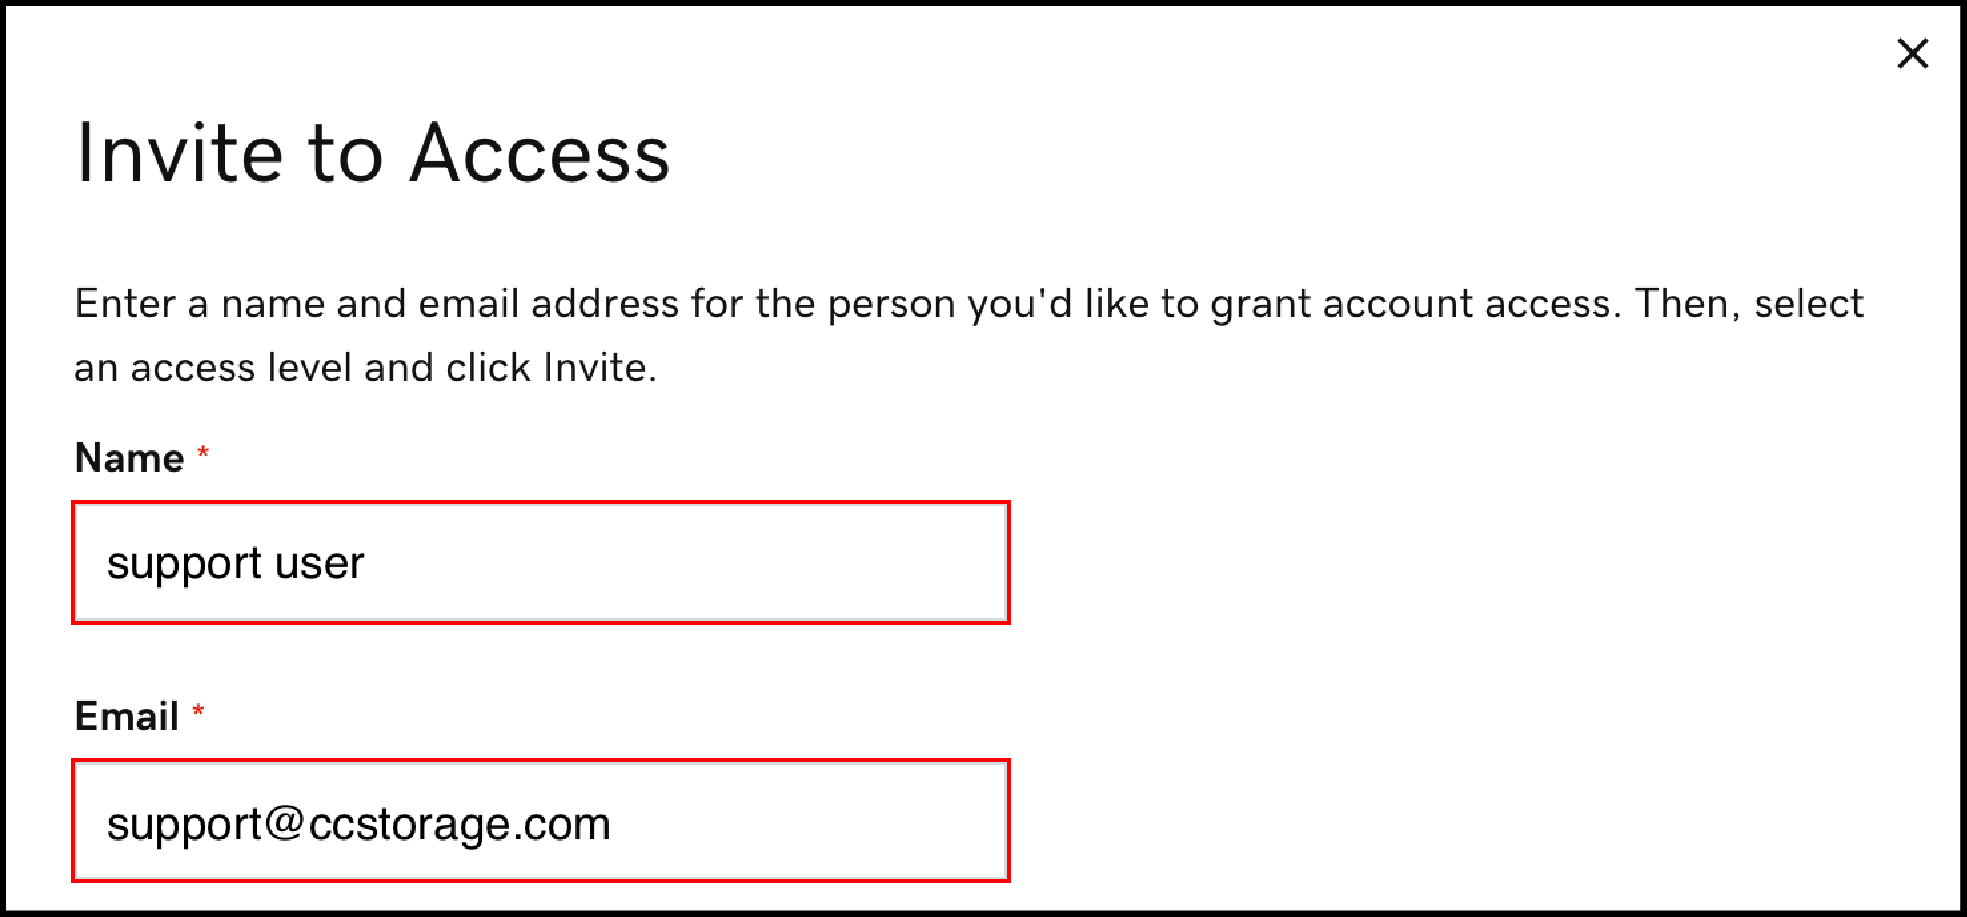
Enter the Name and Email address for the person you're inviting. Our name is support user and our email is support@ccstorage.com. See image below.
Step 4
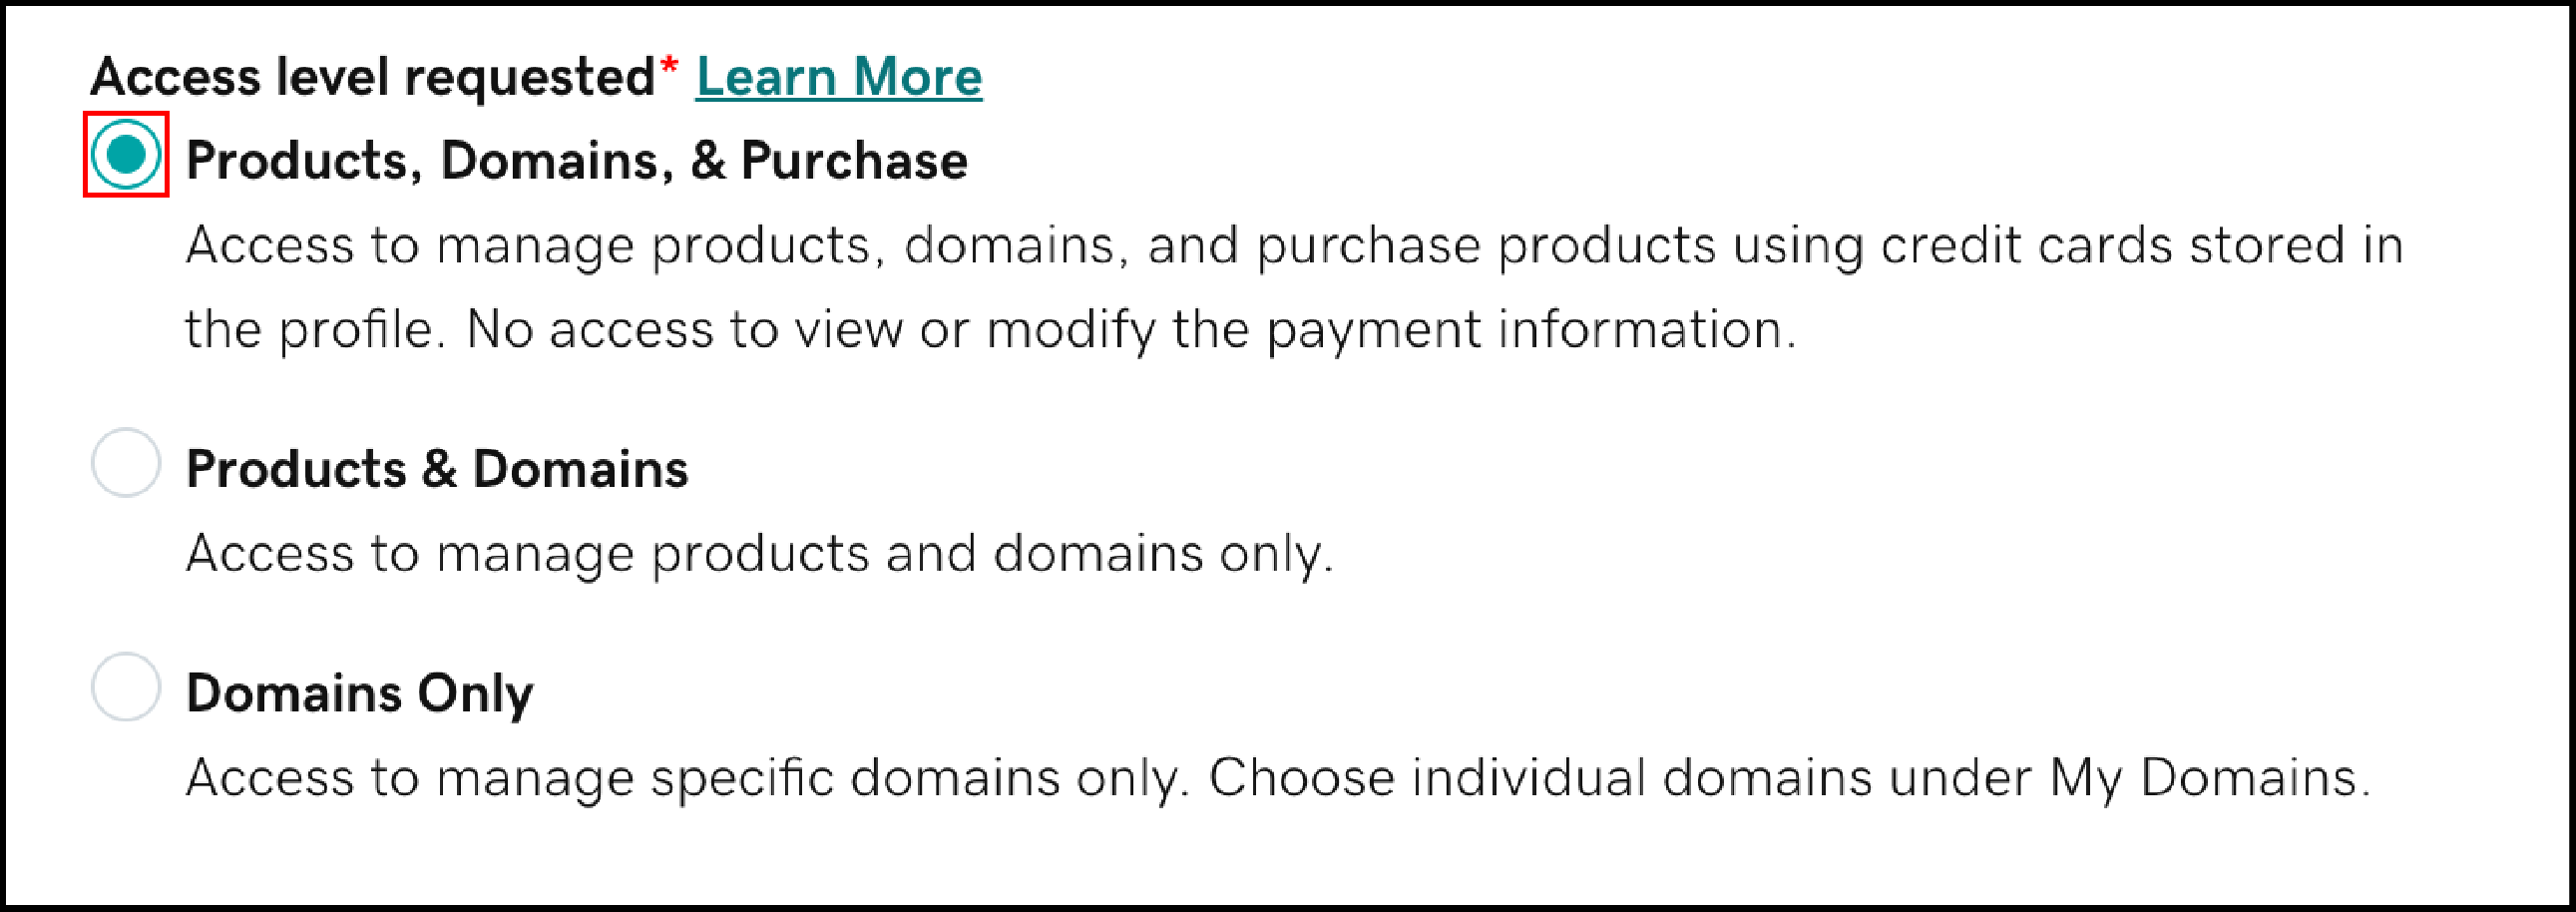
Select one of the access levels. We recommend selecting "Products & Domains" for us to access. See image below.
Step 5
Select Invite. It will send us an email inviting us access to your account. And then that is it! Then we can go live with your website when you are ready.

Step 1
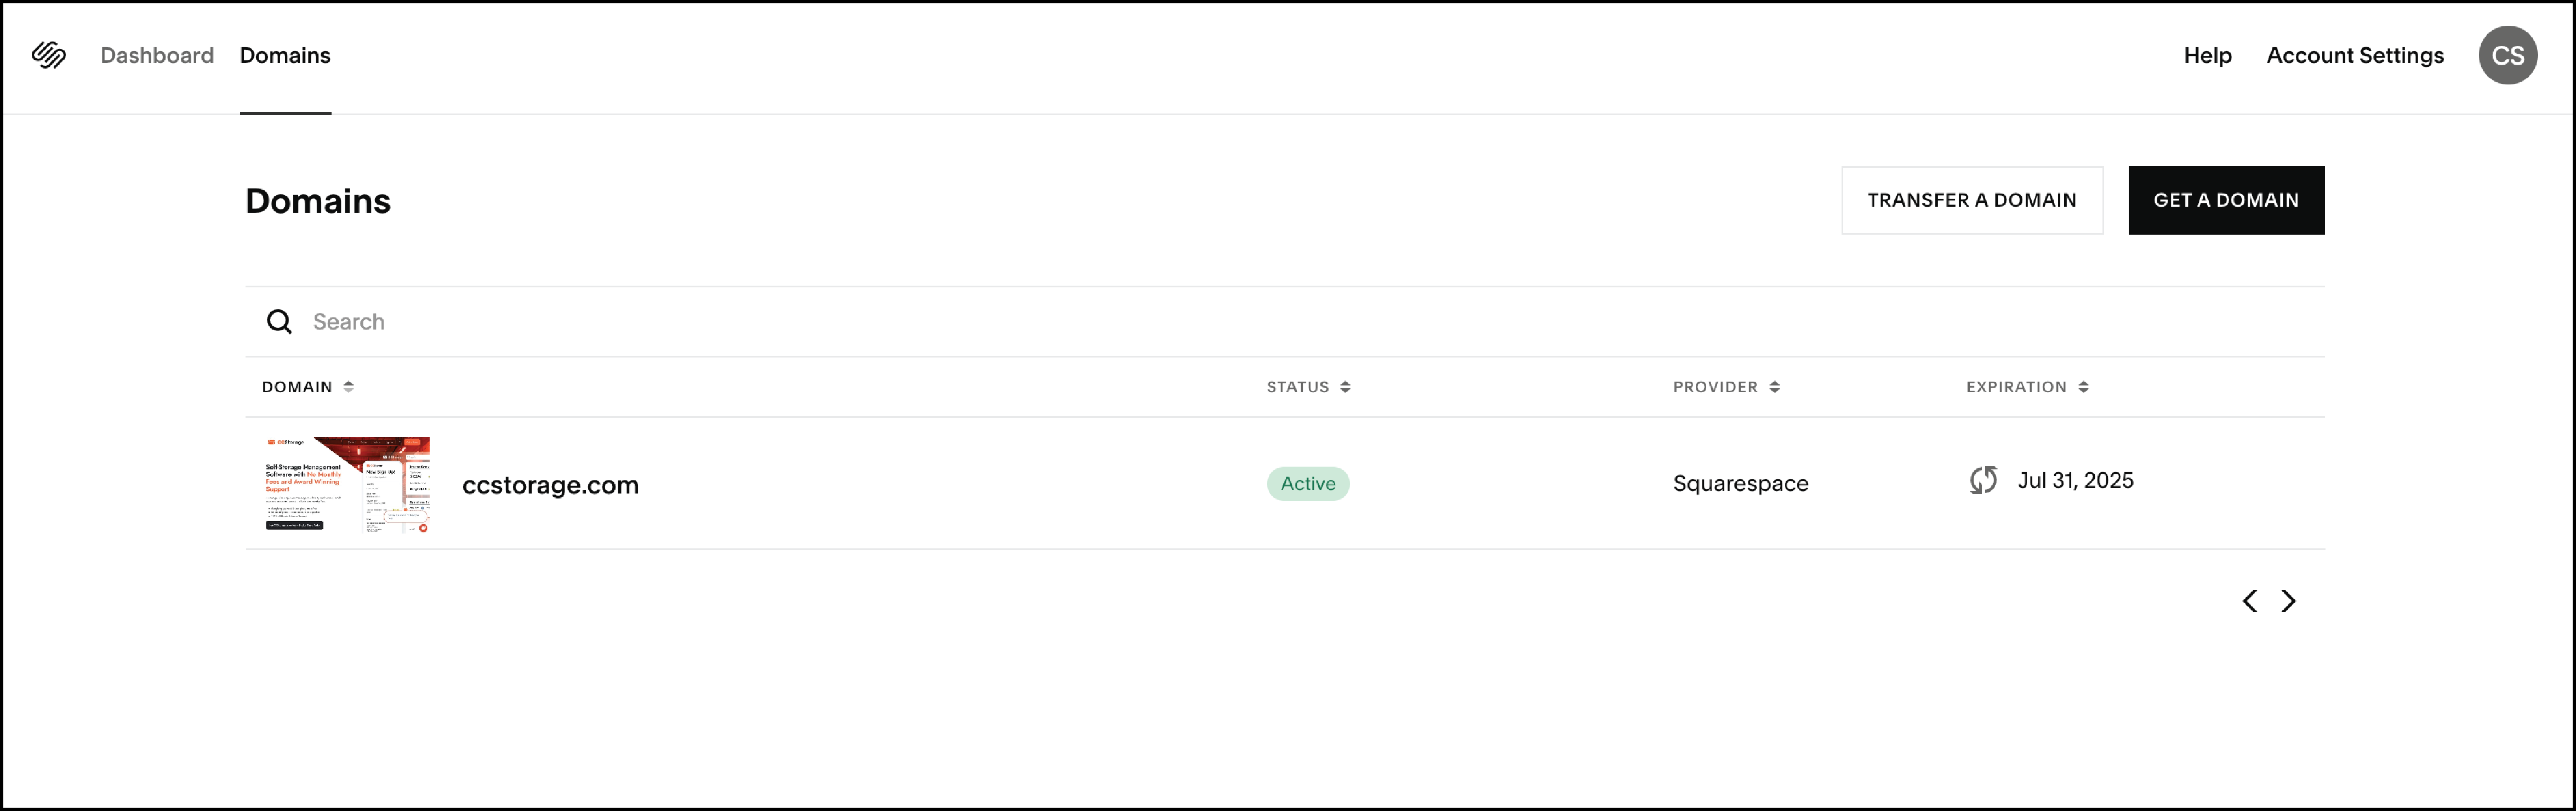
Step 2
Click your Domain, then click Permissions. See image below.
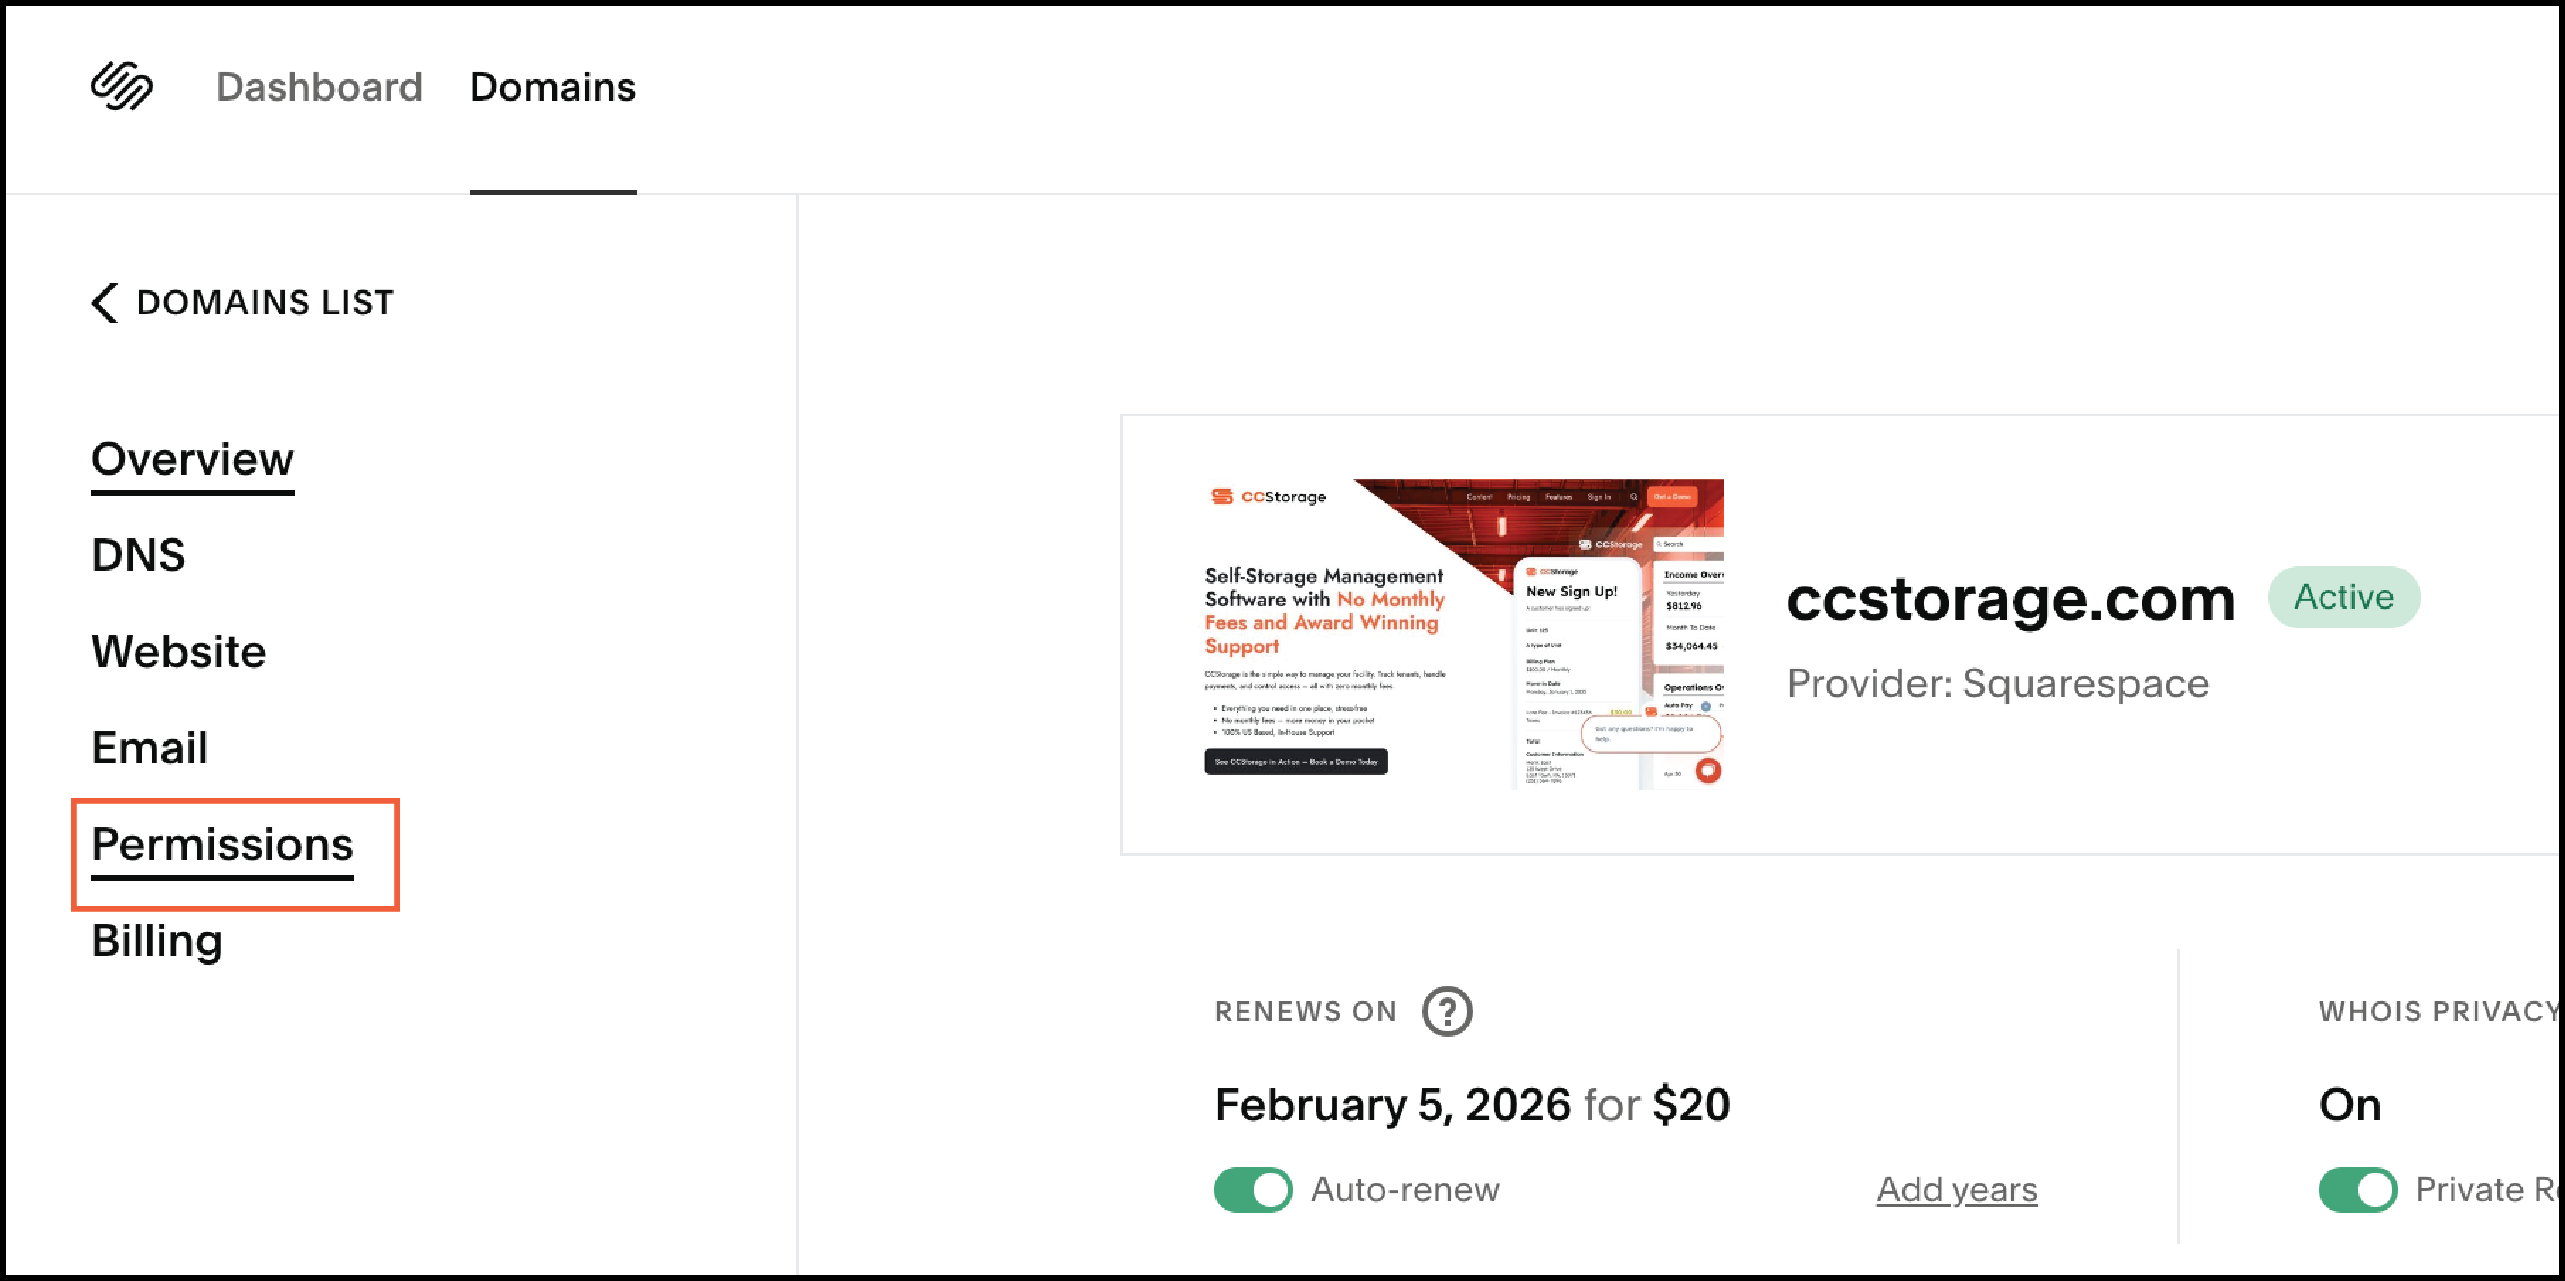
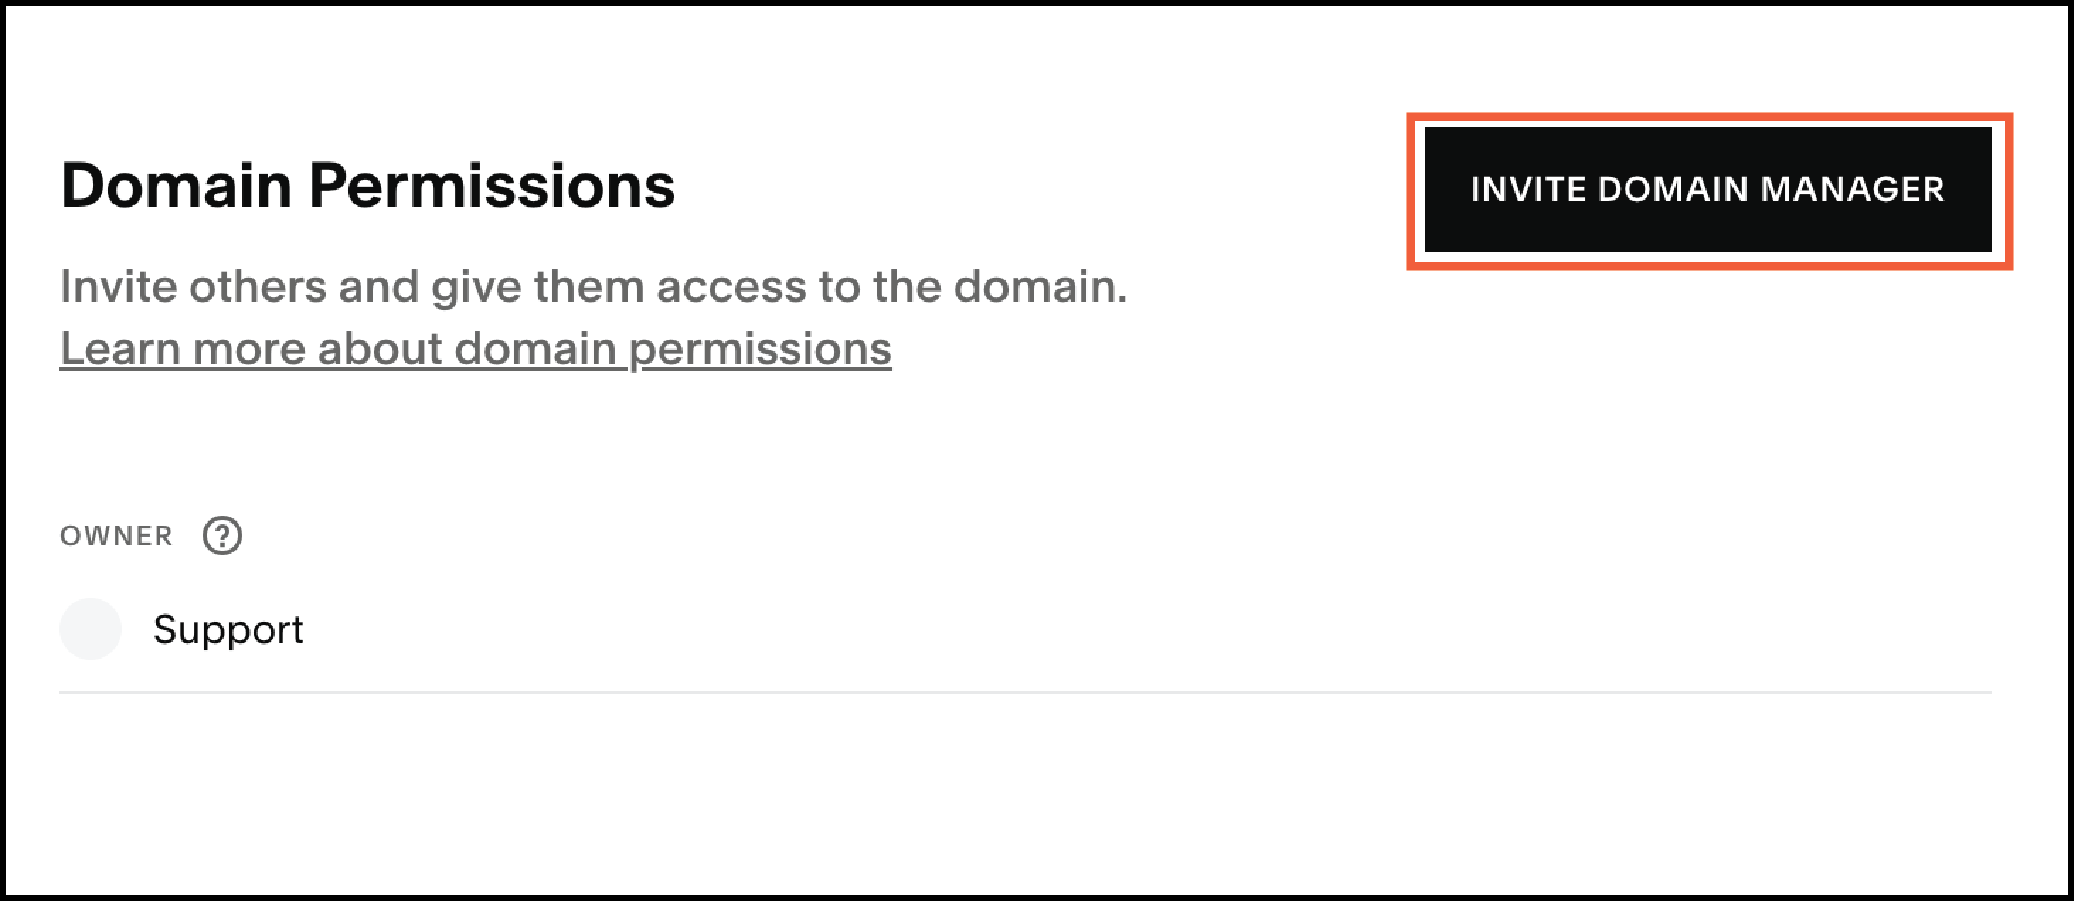
Step 3
Click Invite domain manager. See image below.
Step 4
Enter the Name and Email address for the person you're inviting. Our name is CCStorage Support and our email is support@ccstorage.com. See image below.
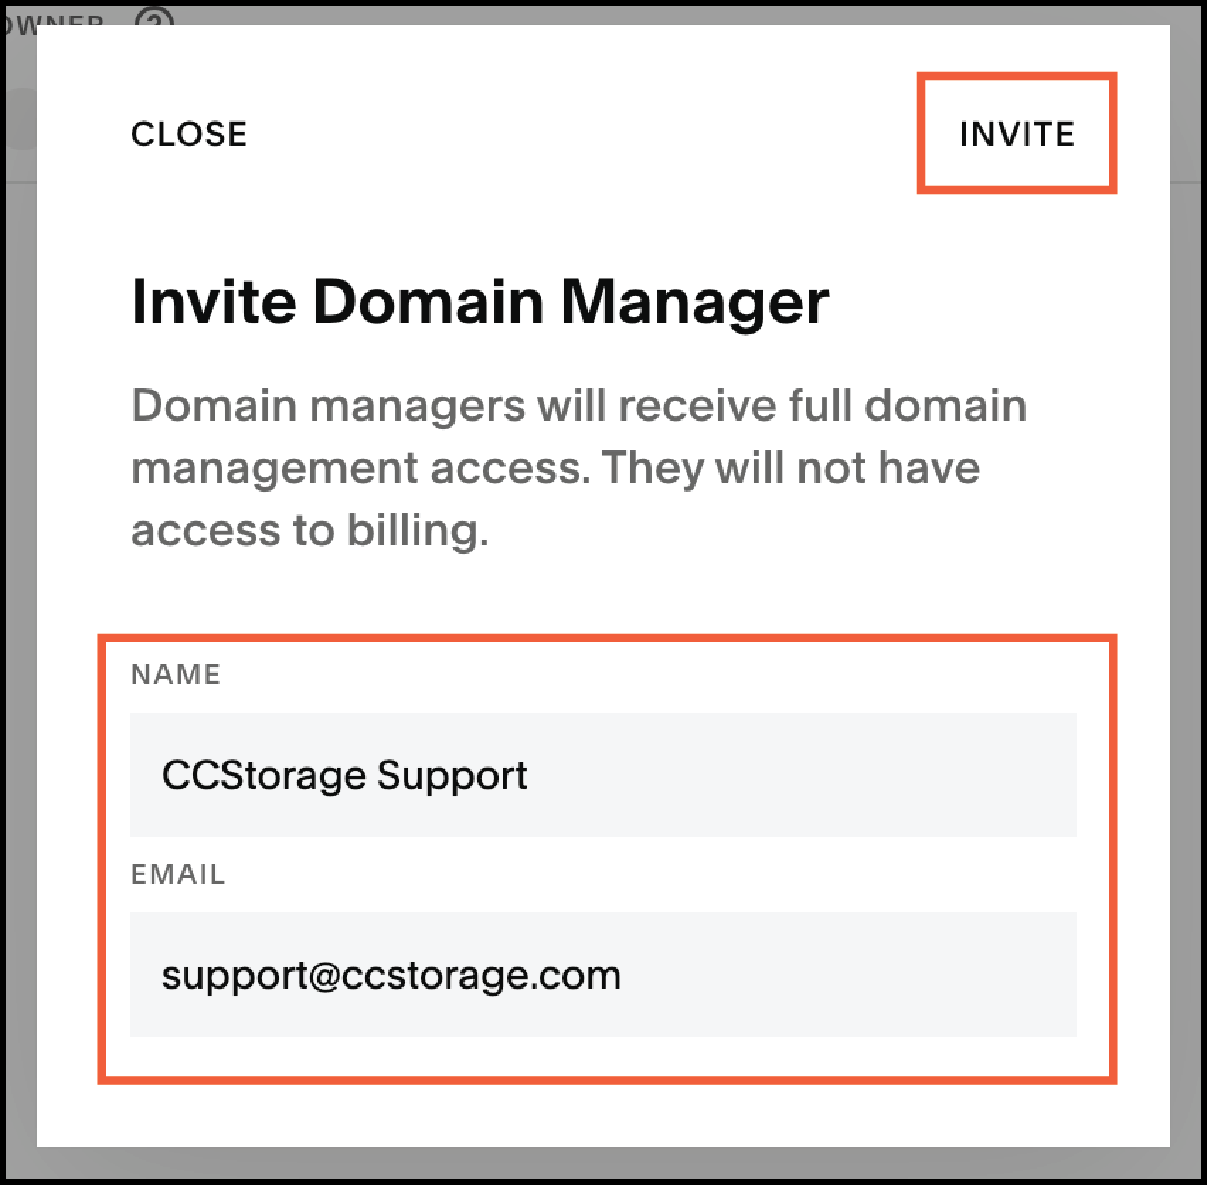
Step 5
Now click Invite. It will send us an email inviting us access to your account. And then that is it! Now we can go live with your website when you are ready.


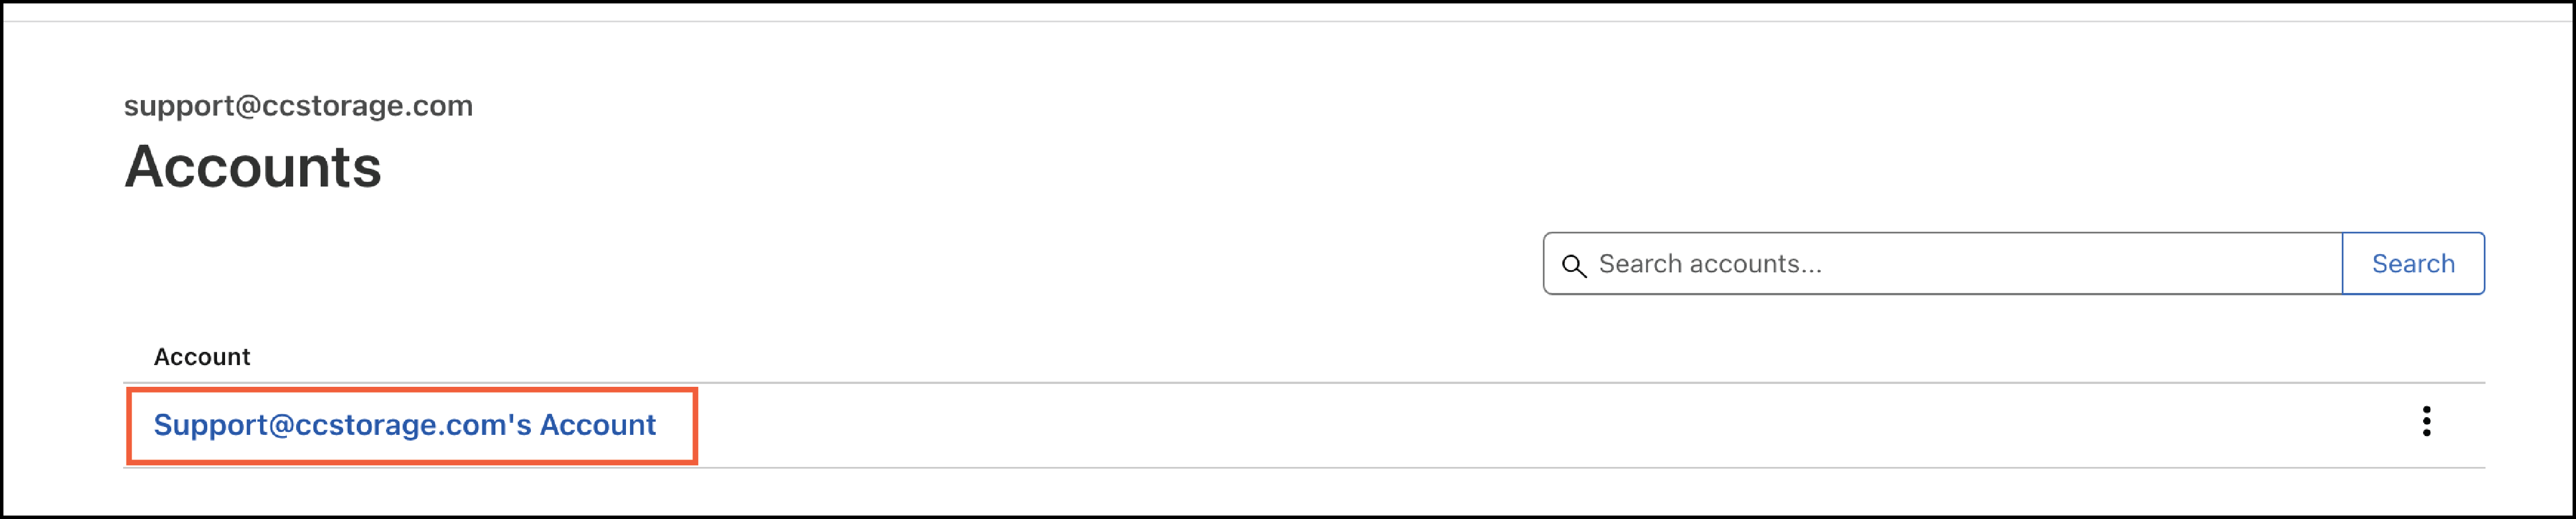
Step 1
Log in to the Cloudflare Dashboard and select your account. You might be prompted to sign in. It should look like the image below.
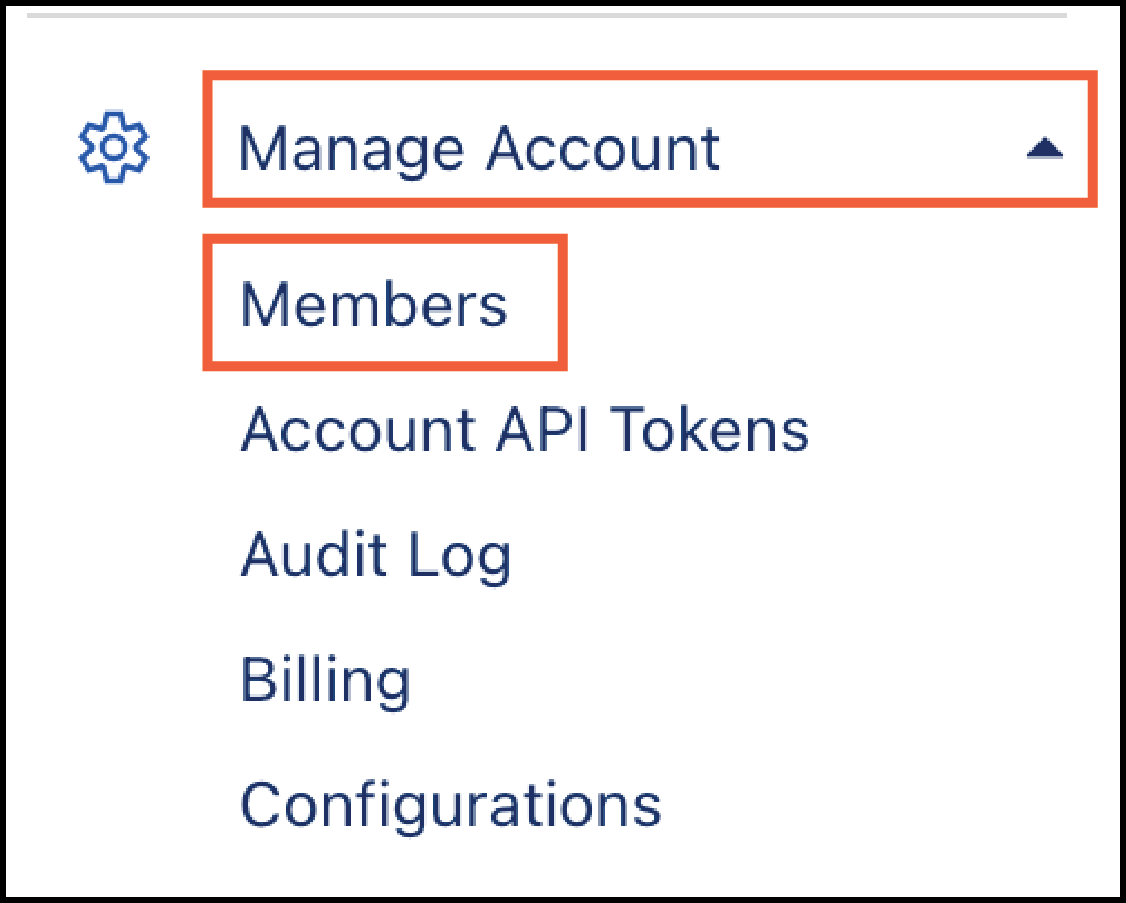
Step 2
Go to Manage Account > Members. See image below.
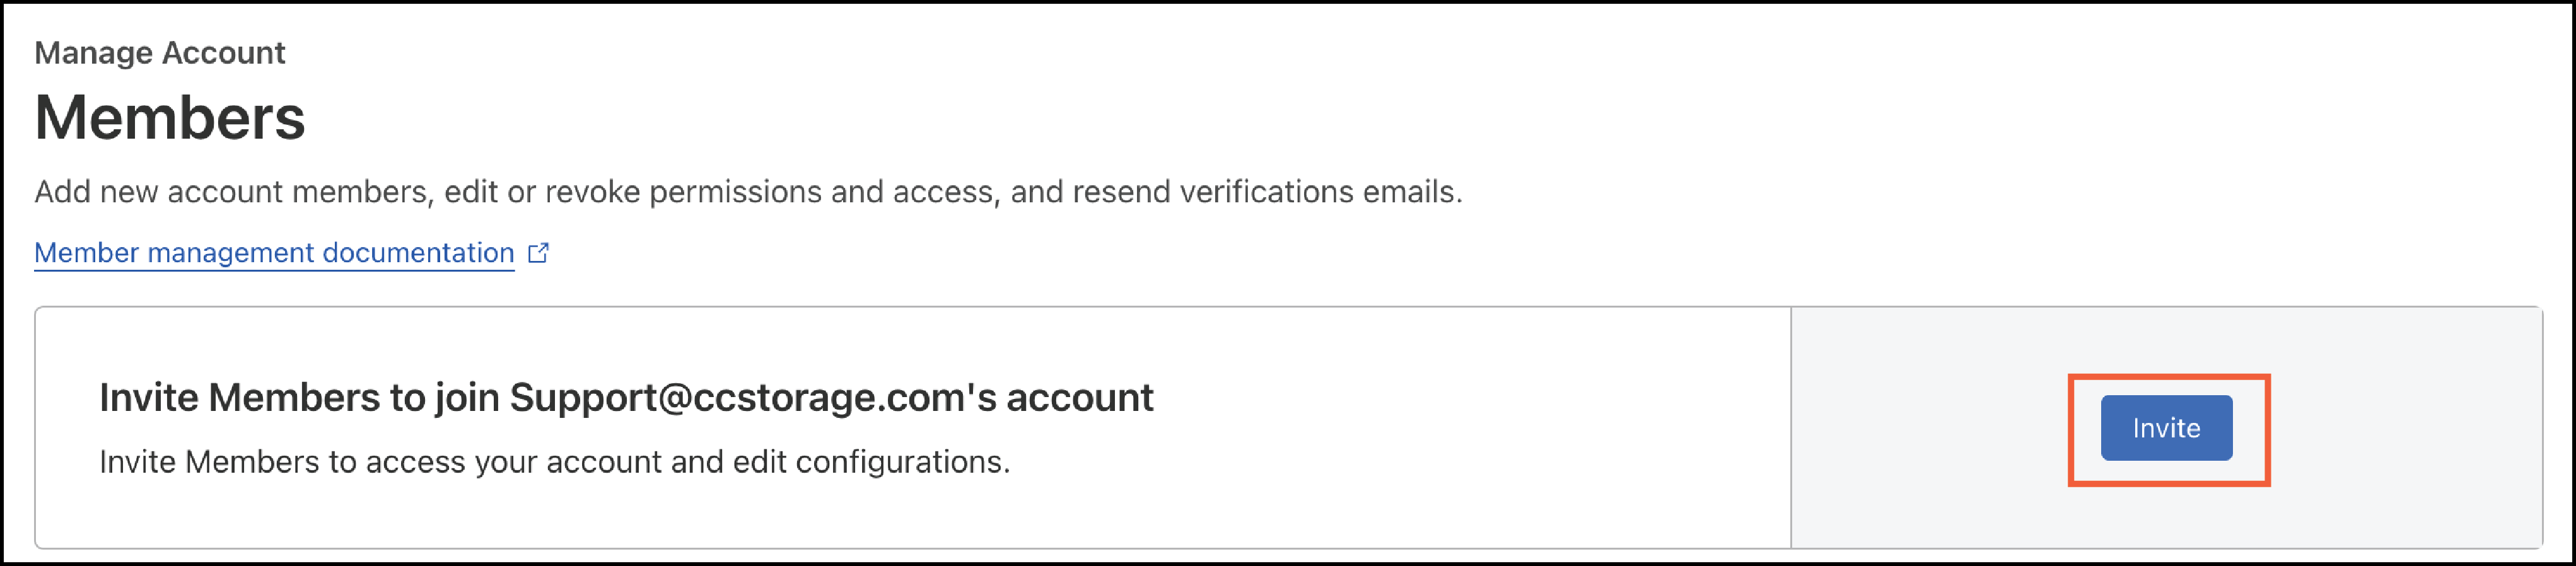
Step 3
Select Invite. See image below.
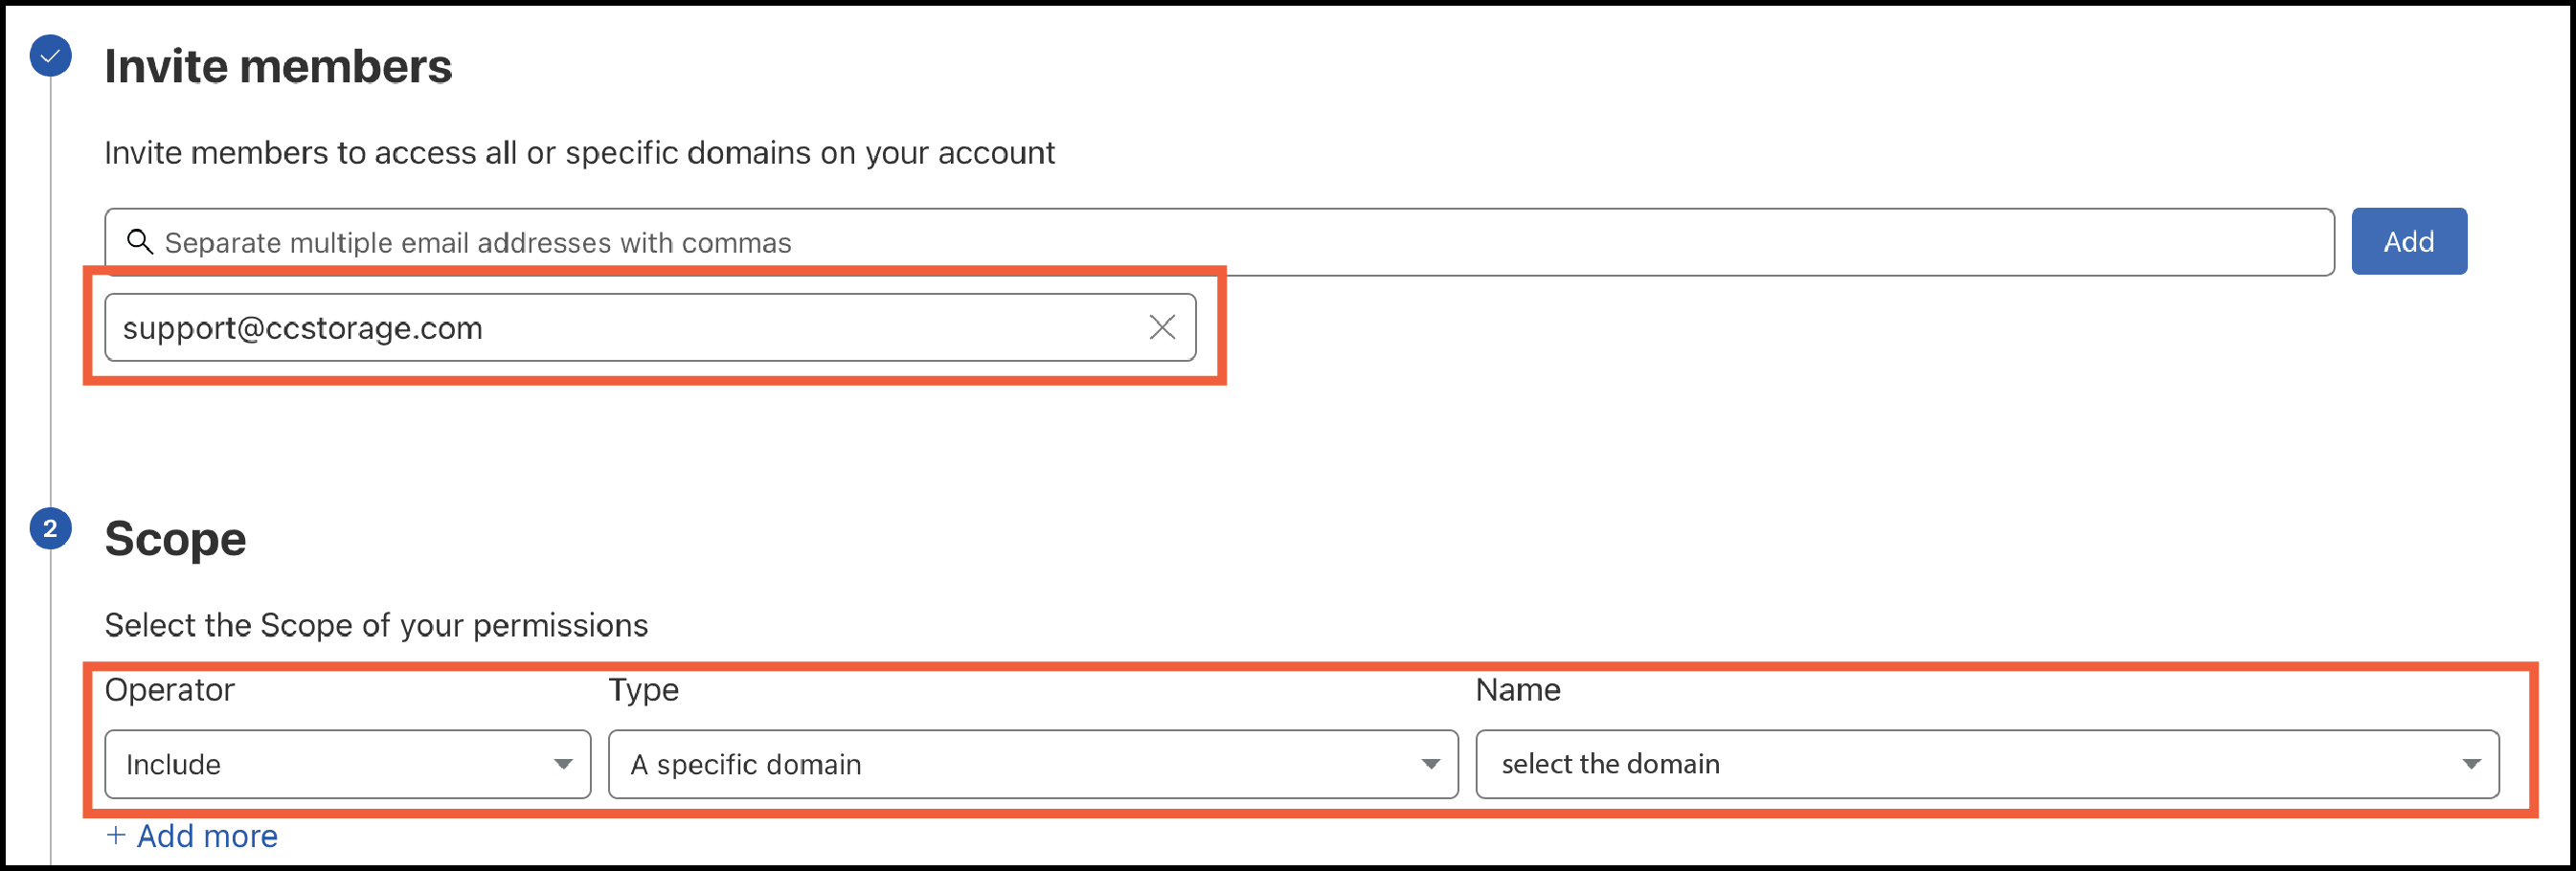
Step 4
Then go to Invite members. Enter our email address which is support@ccstorage.com. Then with Scope, select include, then select a specific domain, and then select the domain you want to give us access. See image below.
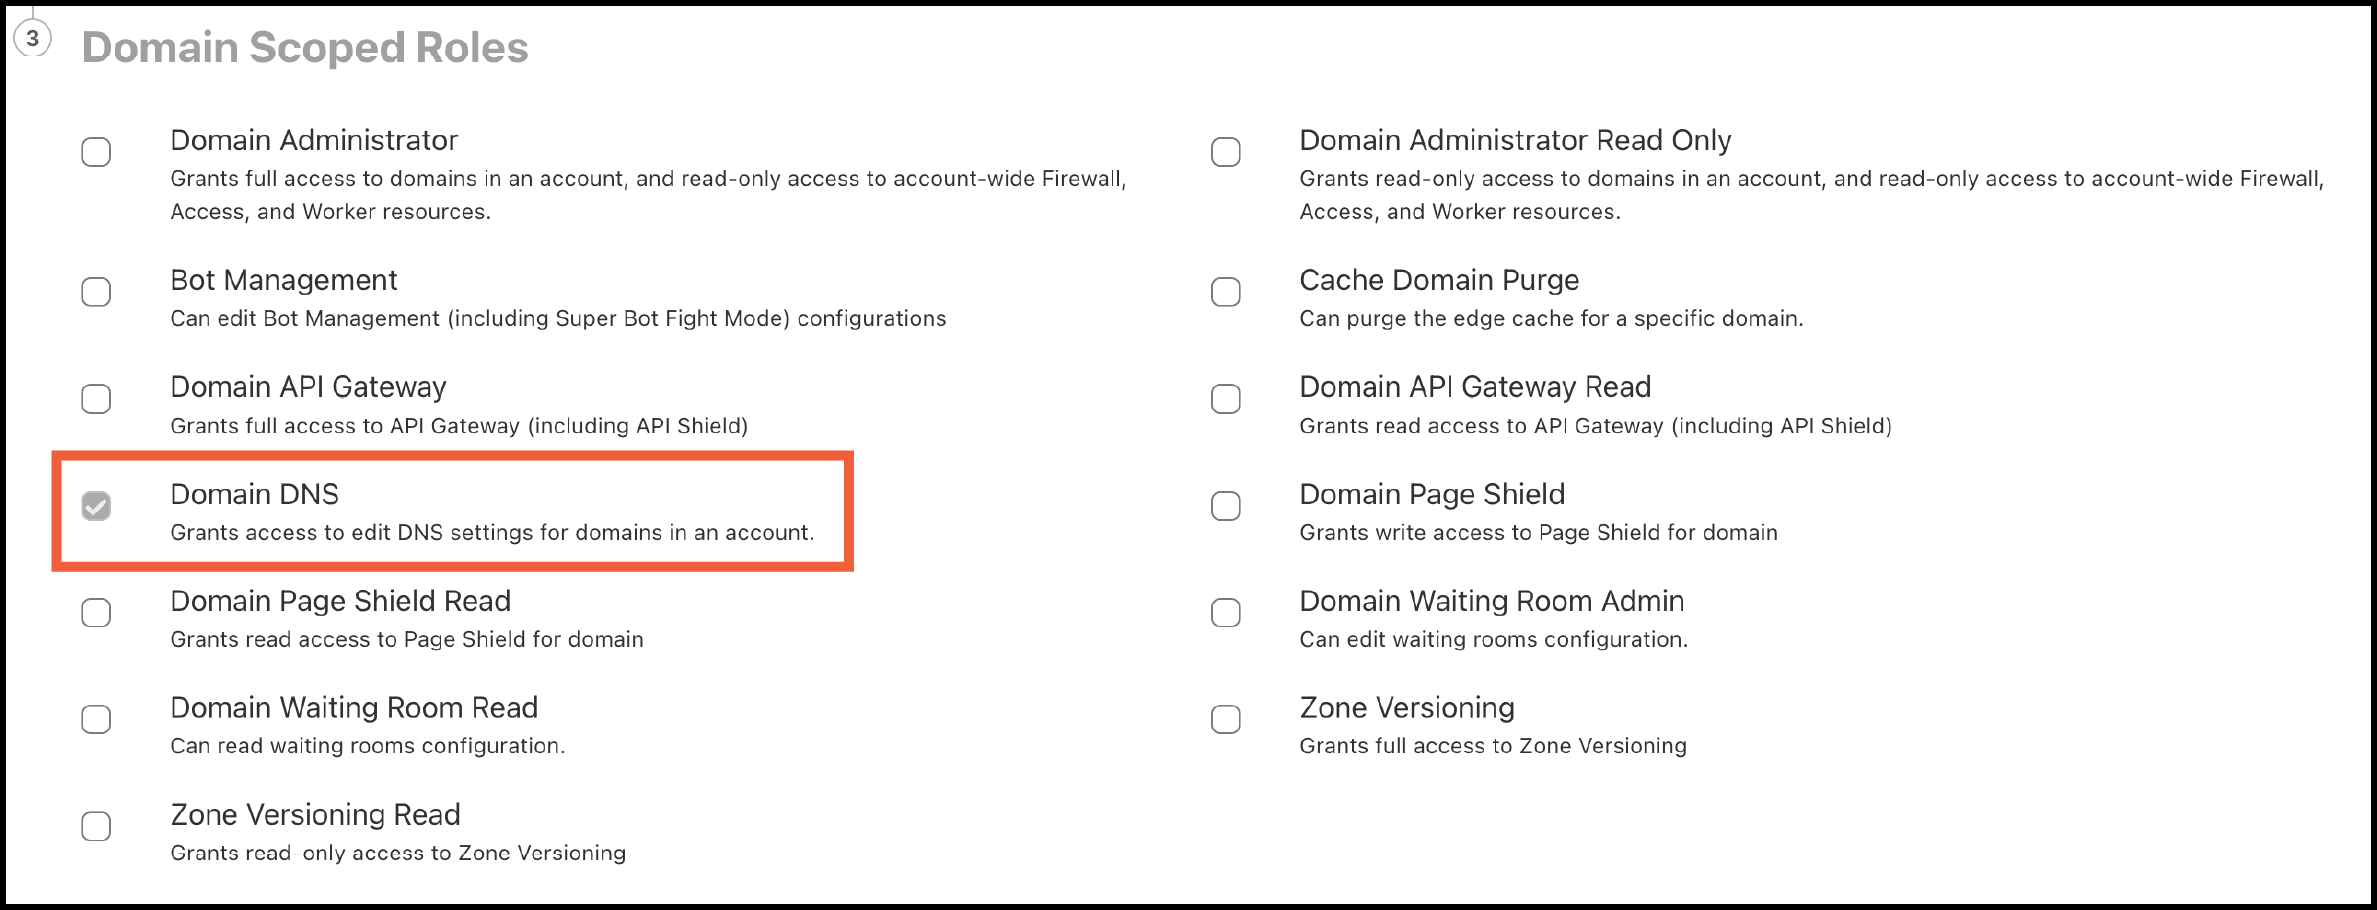
Step 5
After step 4, below you will see Roles with option to select from. Choose Domain DNS and then click Continue to summary below. See image below
Step 6
Review the information, then select Invite. It should send us an email inviting us access to your account. But just incase, reply to the email that you completed this. And then thats it! Now we can go live with your website when you are ready.

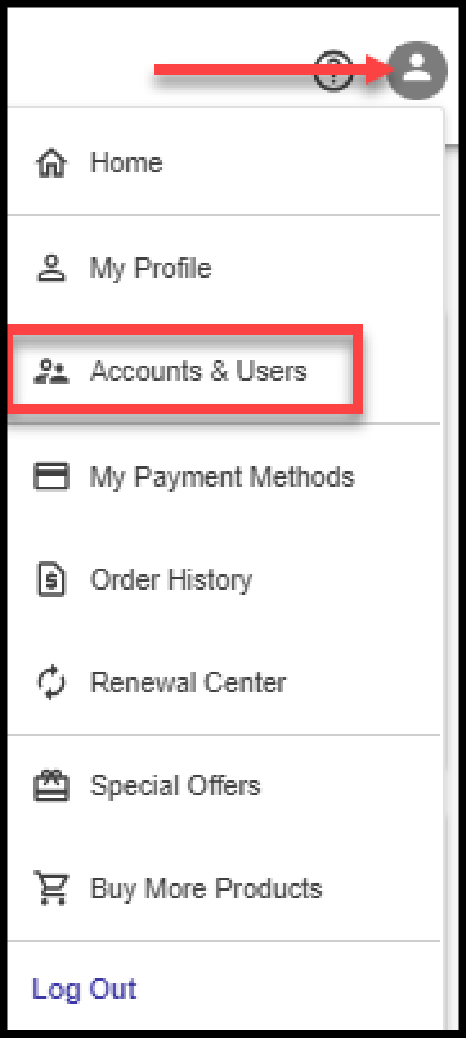
Step 1
Login to your Bluehost Account Manager. Click the profile icon in the top right corner of your page and select the Accounts & Users option from the drop-down menu that appears. See image below
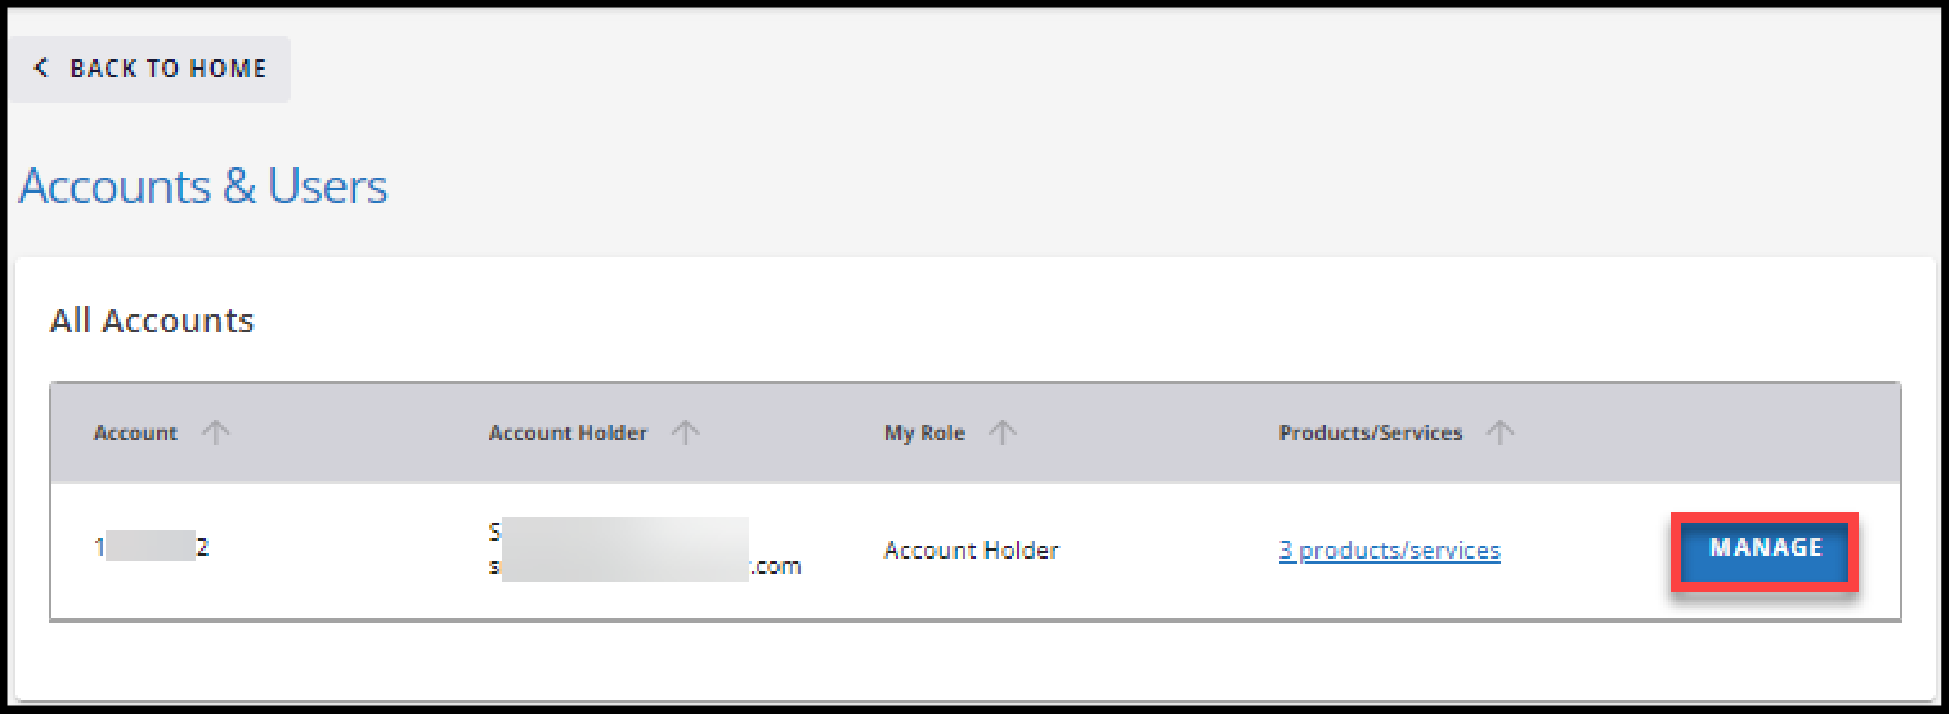
Step 2
Next to the account you wish to add a user to, click the MANAGE button. See image below.
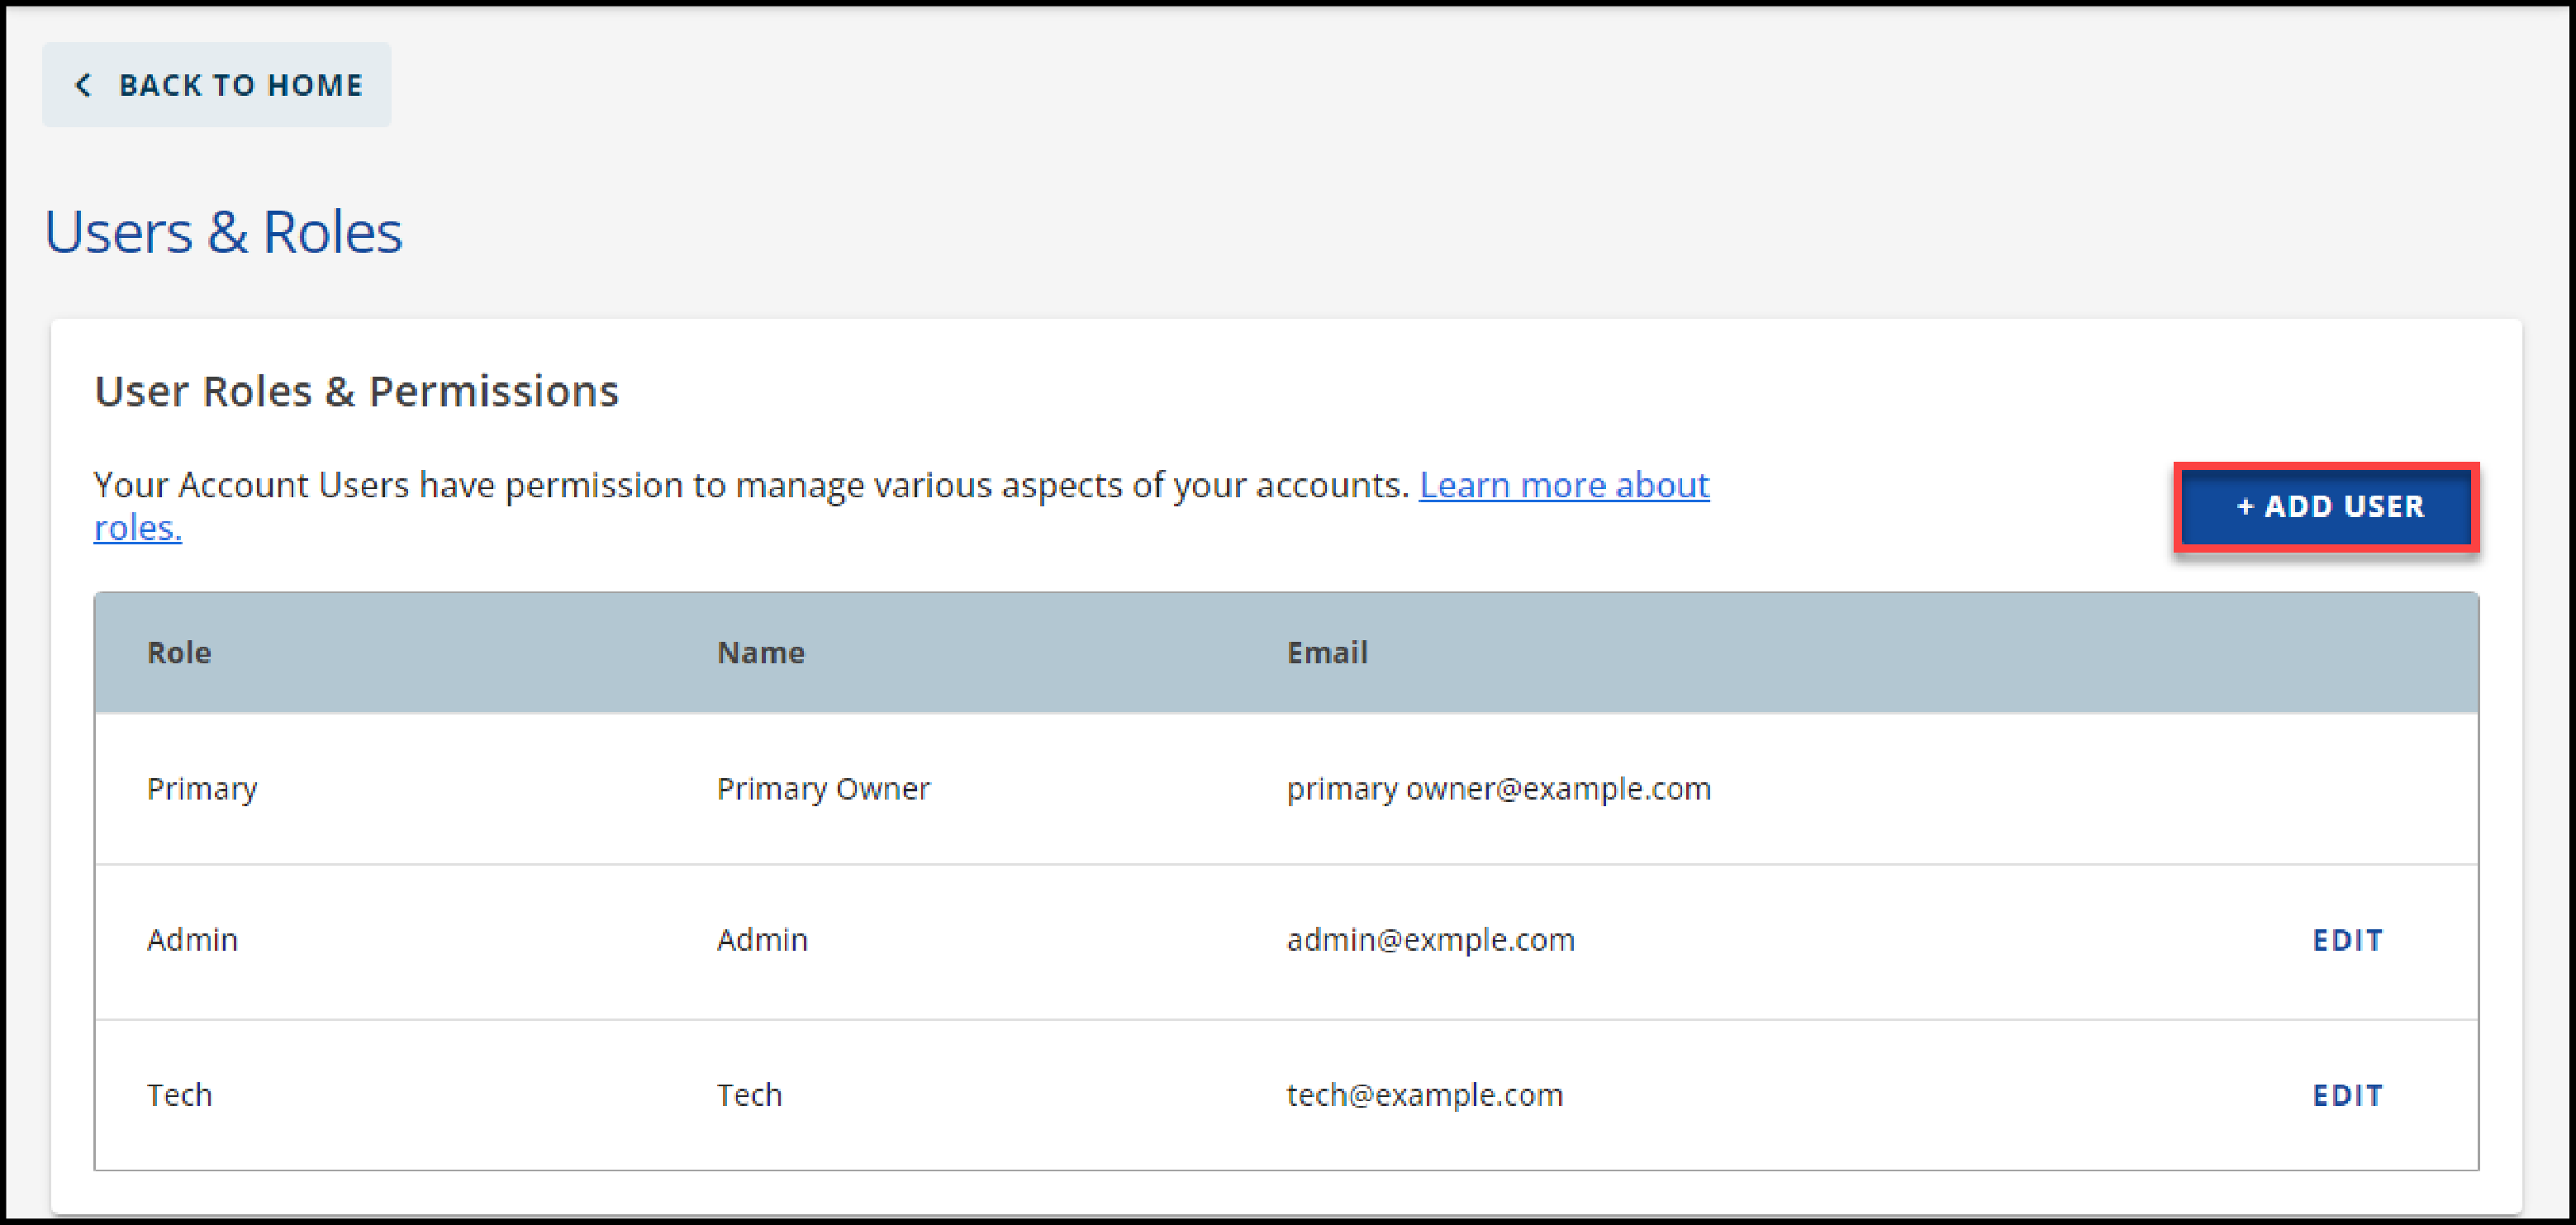
Step 3
Scroll down to the User Roles & Permissions section, and click the + ADD USER button. See image below.
Step 4
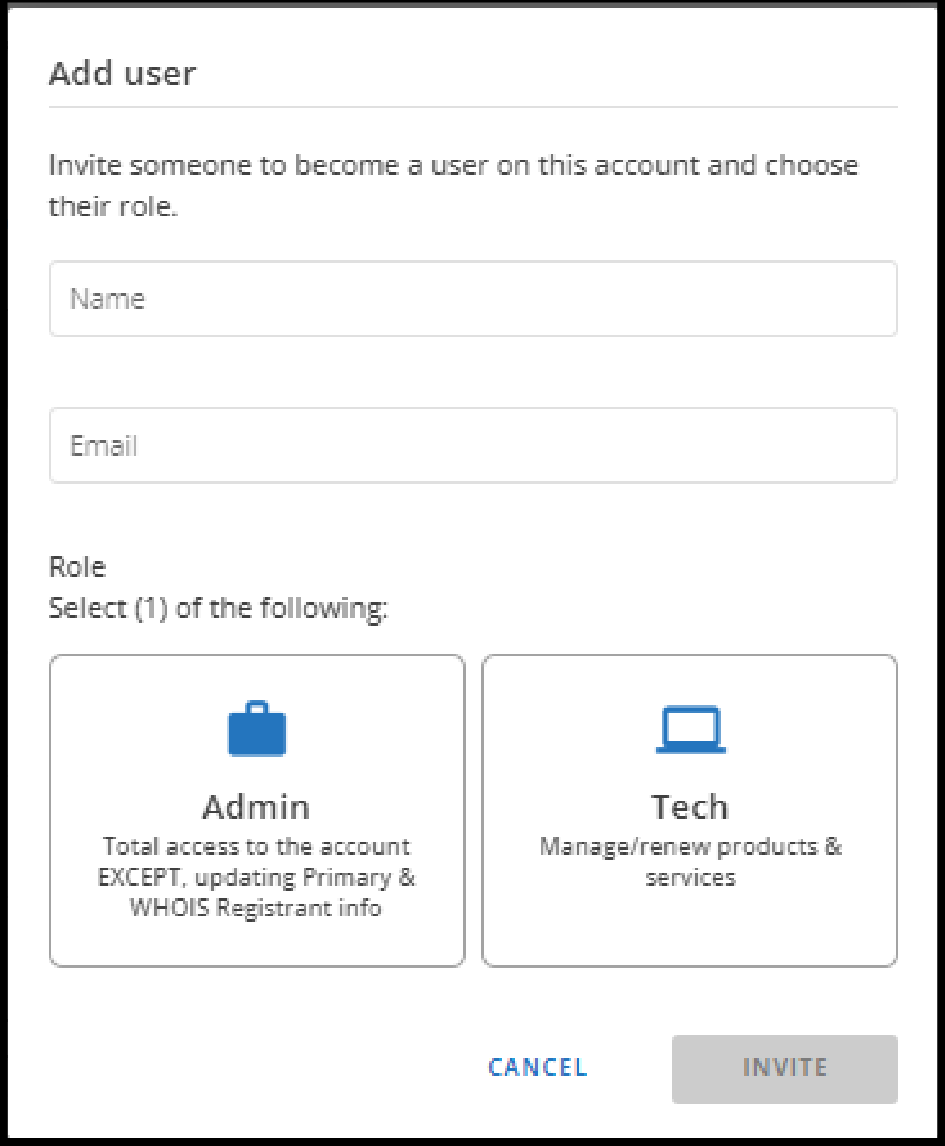
Enter the Name and Email address for the person you're inviting. Our name is supportuser and our email is support@ccstorage.com. Then click the admin role and then INVITE. See image below.
Step 5
An invite will be sent to the email address provided. And then thats it! Now we can go live with your website when you are ready.
Step 1
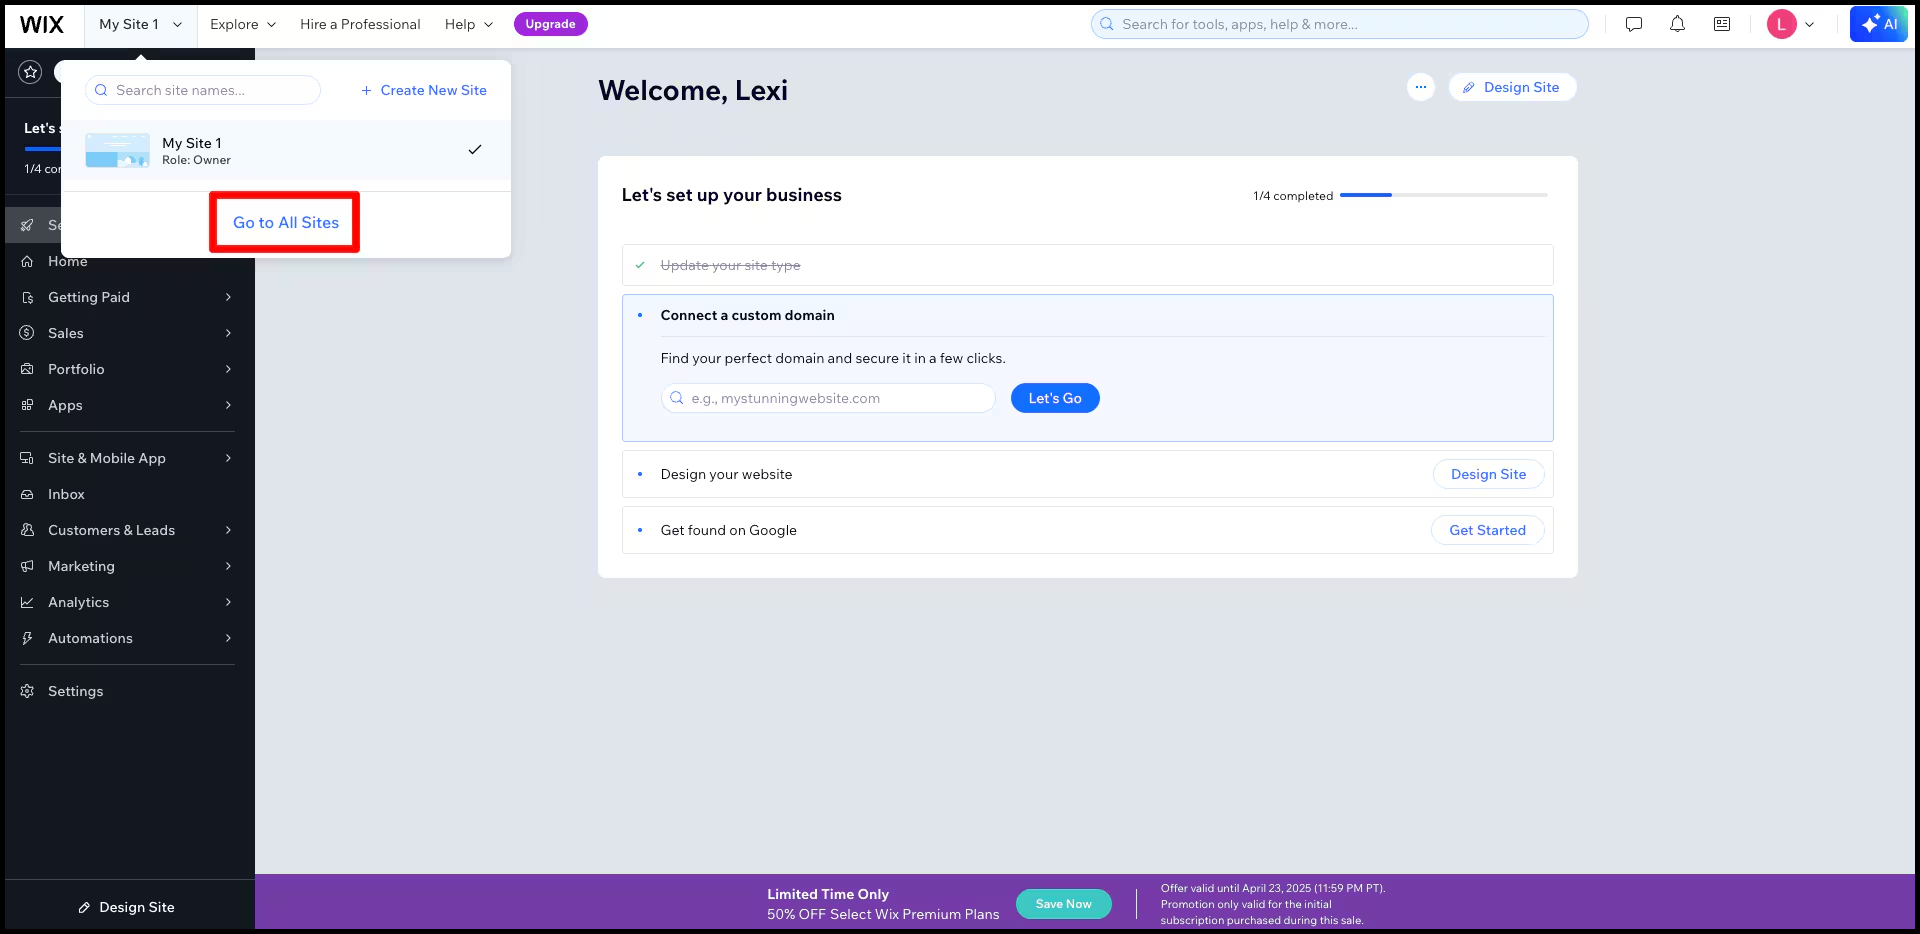
Log in to your WIX Account. Then on the Right, click on My Sites and click on Go to All Sites:
Step 2
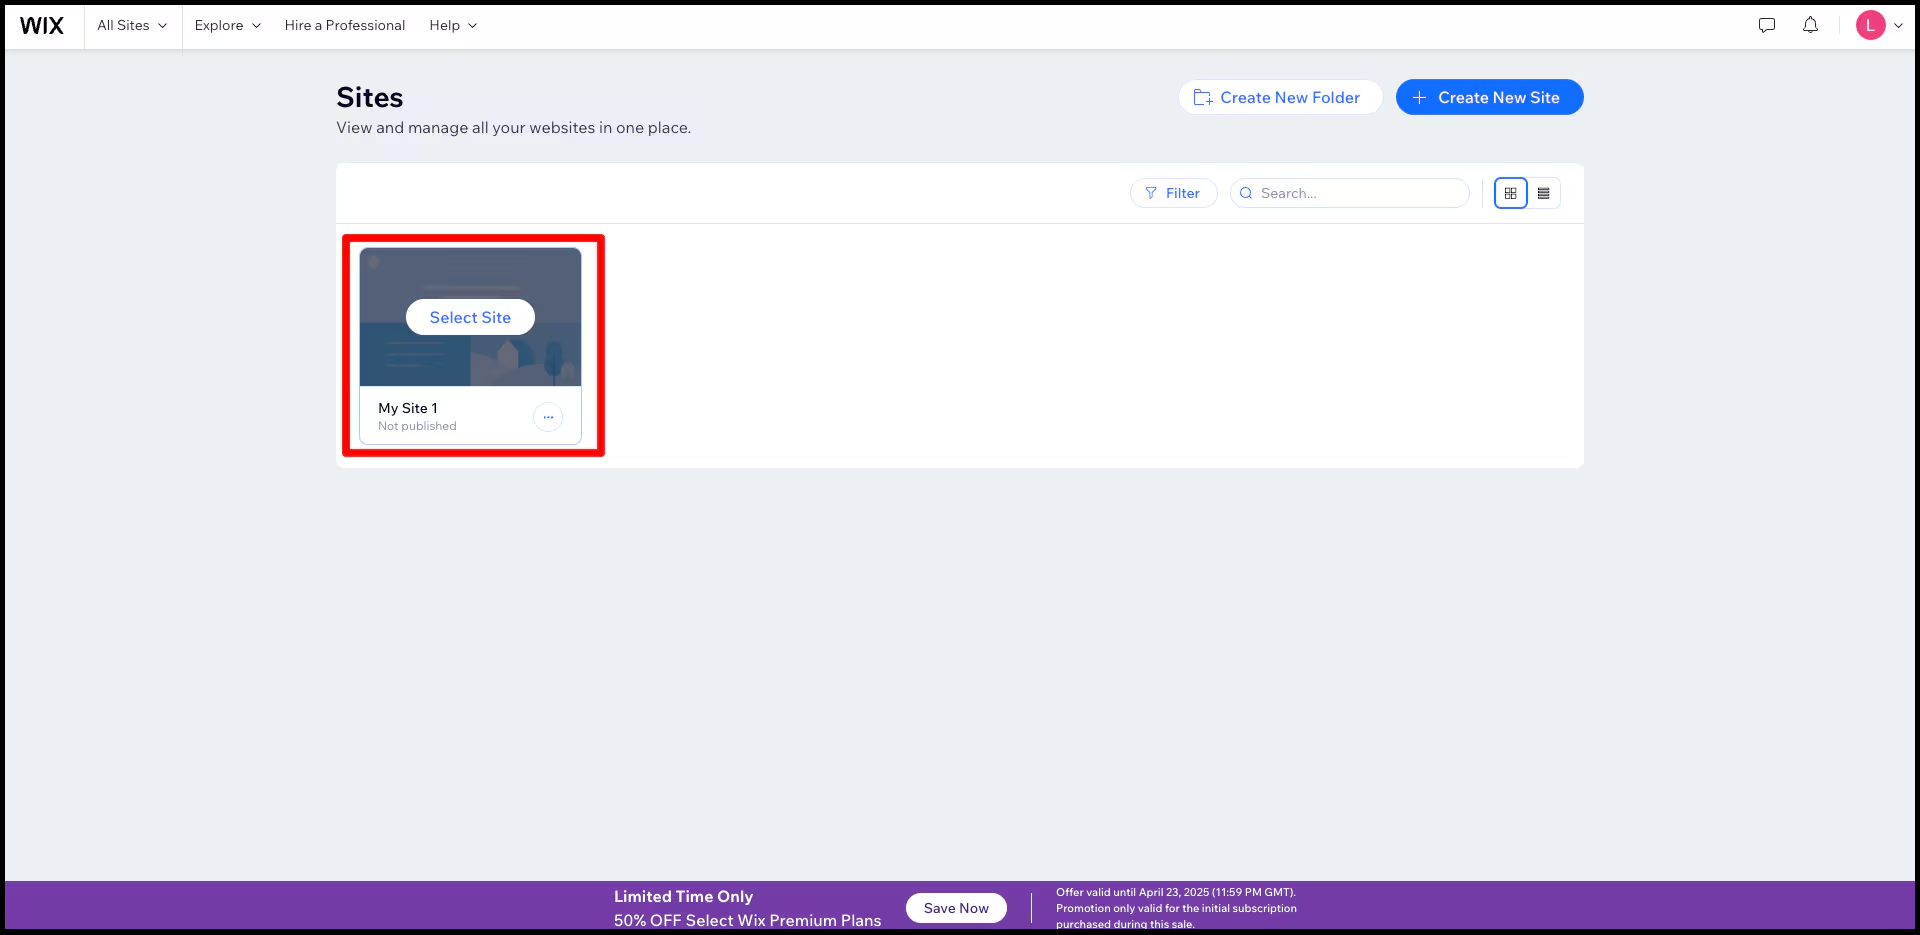
Select the Domain you want to delegate access to and click Select Site.
Step 3
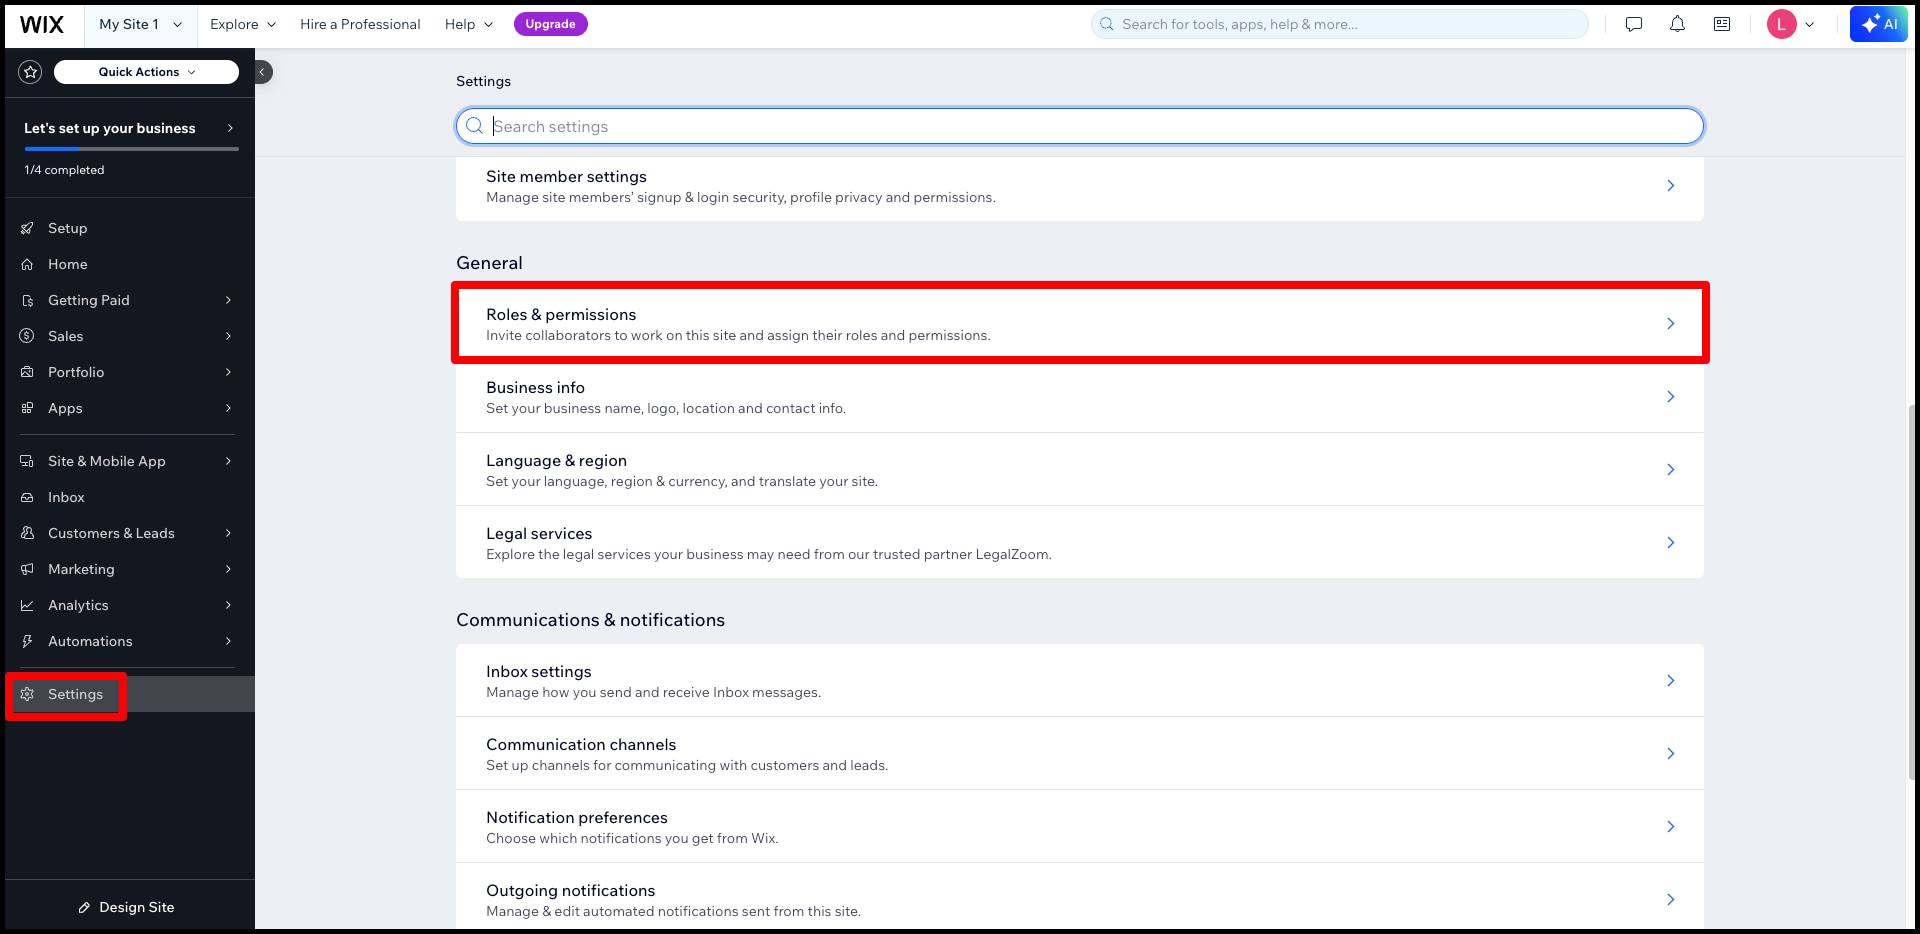
Choose Settings, then click Roles & Permissions:
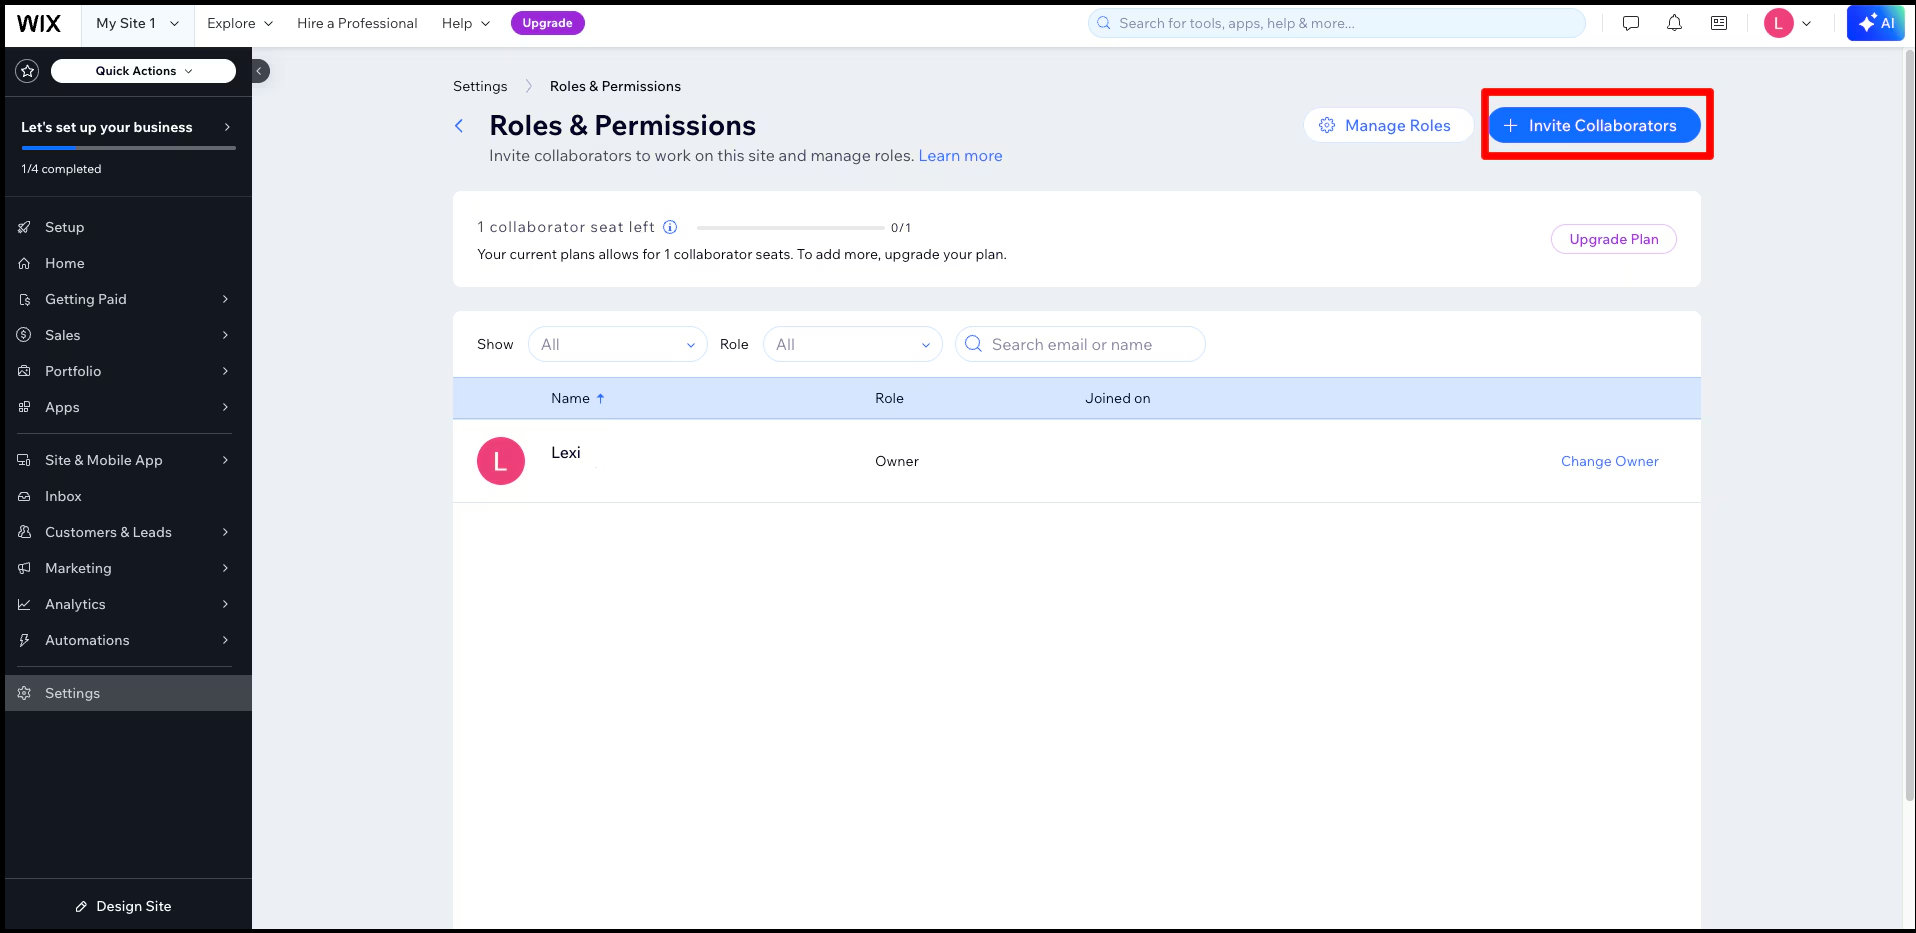
Step 4
Under the Roles & Permissions, click the Invite Collaborators button.
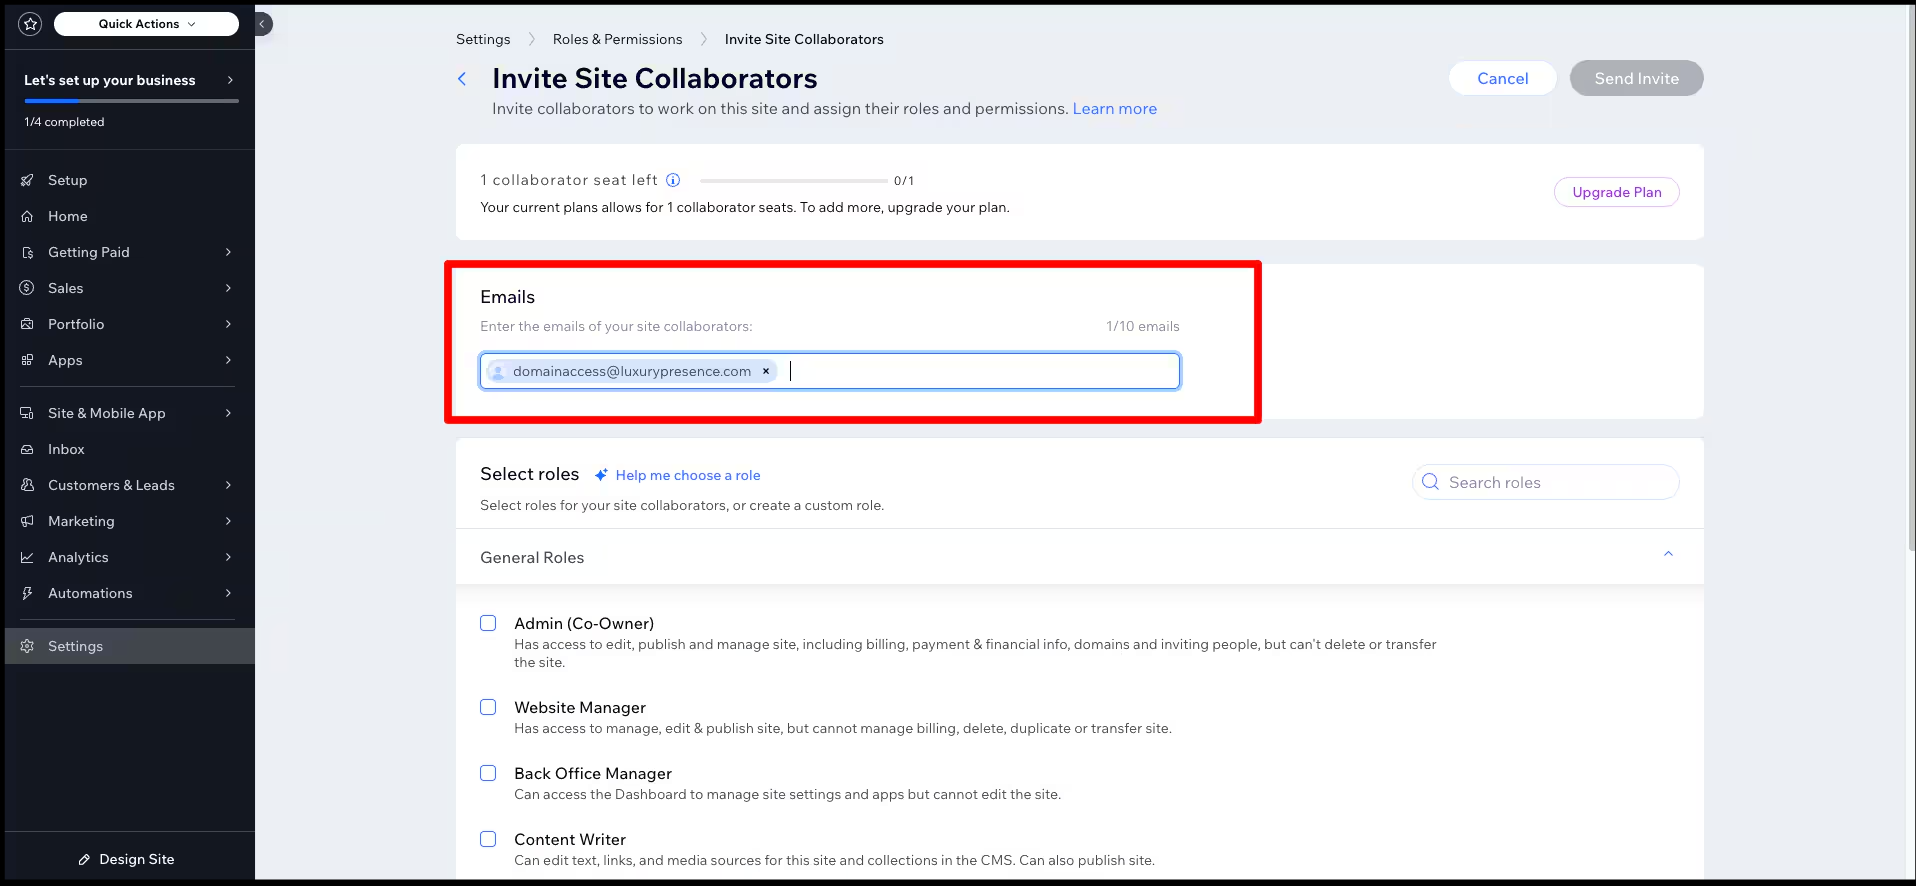
Step 5
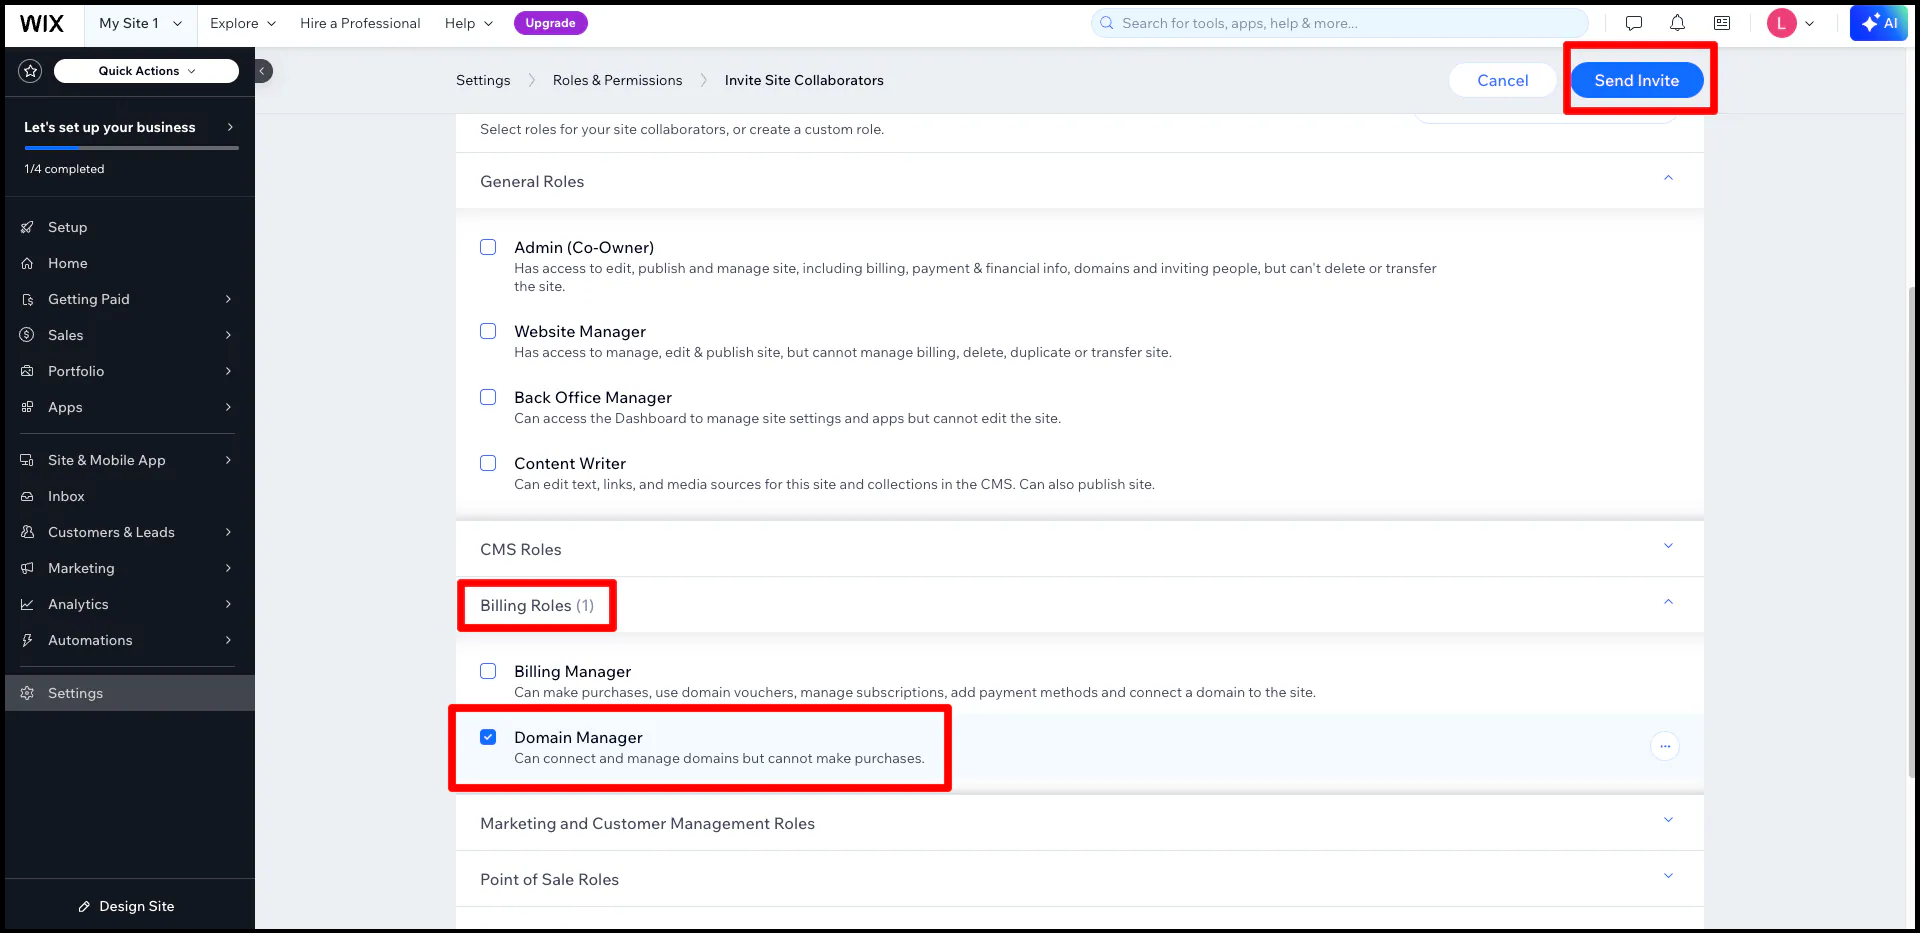
Step 6
Under Billing Roles tab choose Domain Manager as the Role. Click the Send Invite.
Step 7
And you’re done! The invite will be sent to the email address provided. Now we can go live with your website when you are ready
